QuickStart
The Scenario Modeling Hub uses GitHub for submission and storing of scenario projections.
The following QuickStart aims to help teams without previous knowledge of GitHub make a first submission or access the repository (without using the command line).
You must have a GitHub account to submit data. To create a GitHub account (free), please go to: https://github.com/ and follow the "sign-up" steps. For more documentation, please consult the Creating on account on GitHub documentation page.
Quickstart
To submit projection for the first time, please follow these 5 steps:
1. Fork the repository
A “fork” is a copy of a GitHub repository that allows users to change the contents of the repository and then to share them back for inclusion in the original repository. See the GitHub description of forks for a more detailed description.
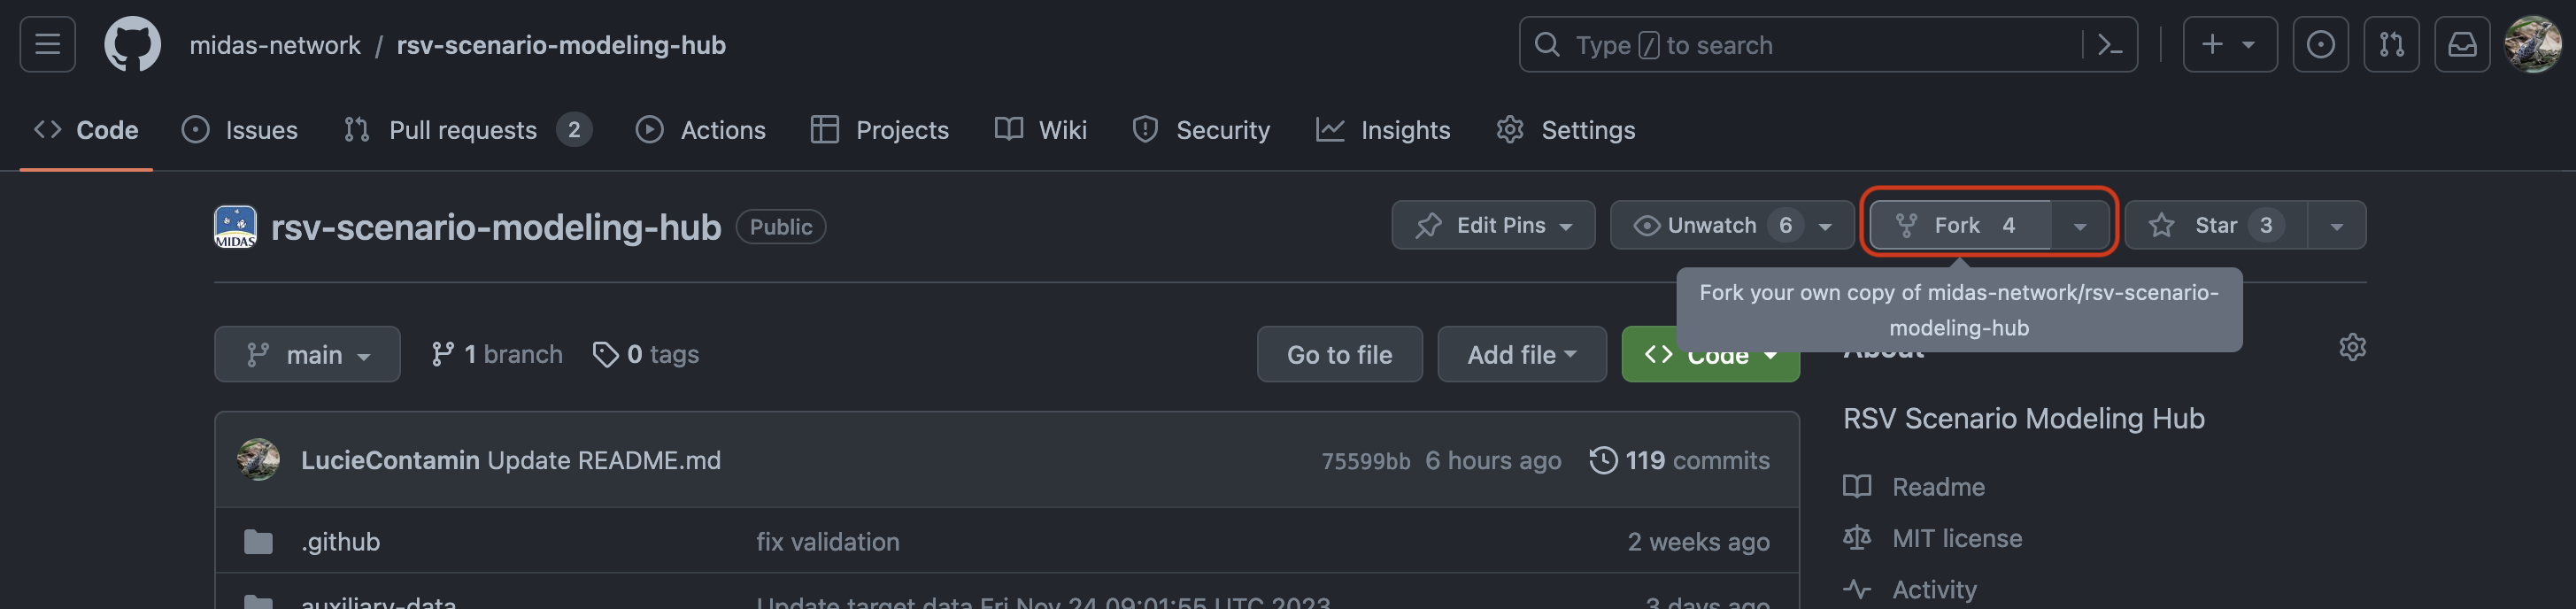
To submit data to the RSV Scenario Modeling Hub, the first step is to
fork the hub’s repository. Please go to repository of interest, for example:
https://github.com/midas-network/rsv-scenario-modeling-hub
and click on “fork” on the top right
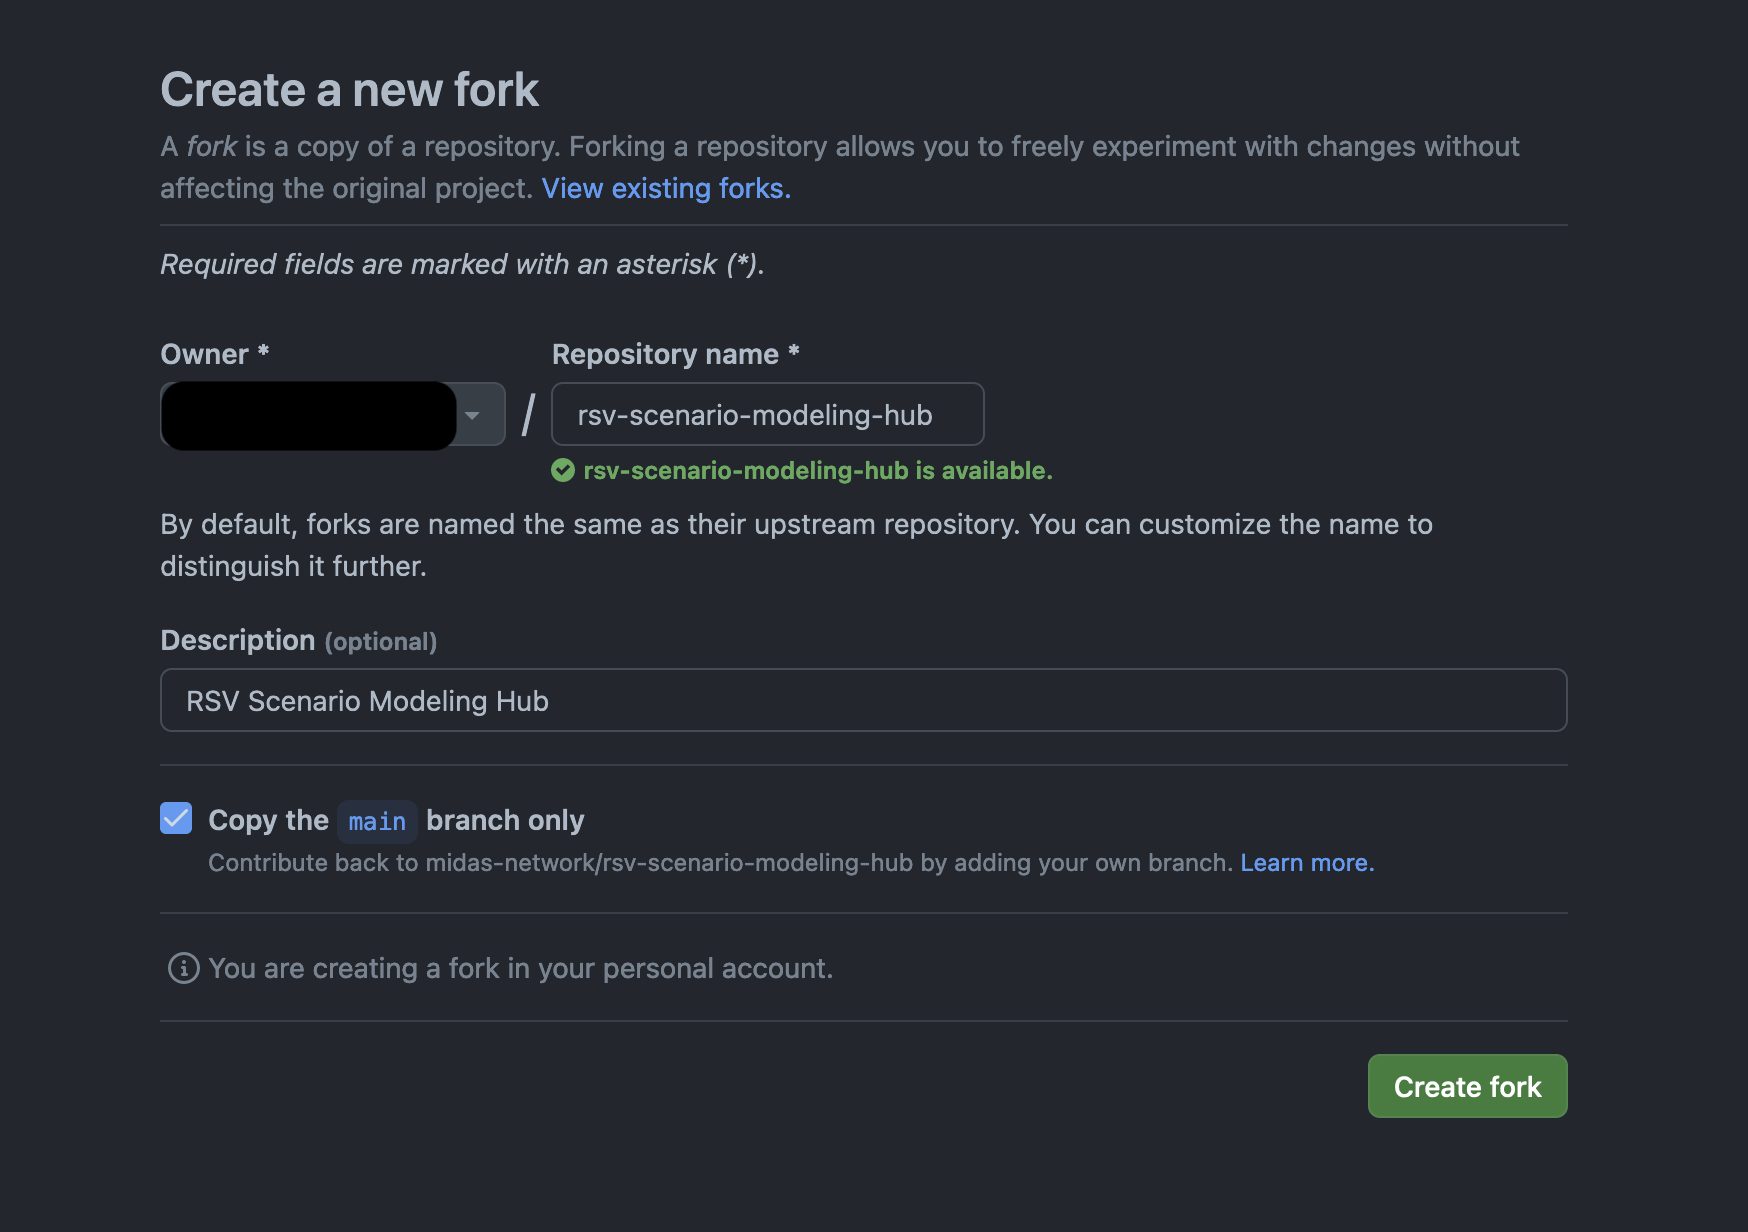
This will open a new “Create a new fork” page, with the name of the new forked
repository. All the fields are filled by default, and so you can (and probably
“Create fork”.
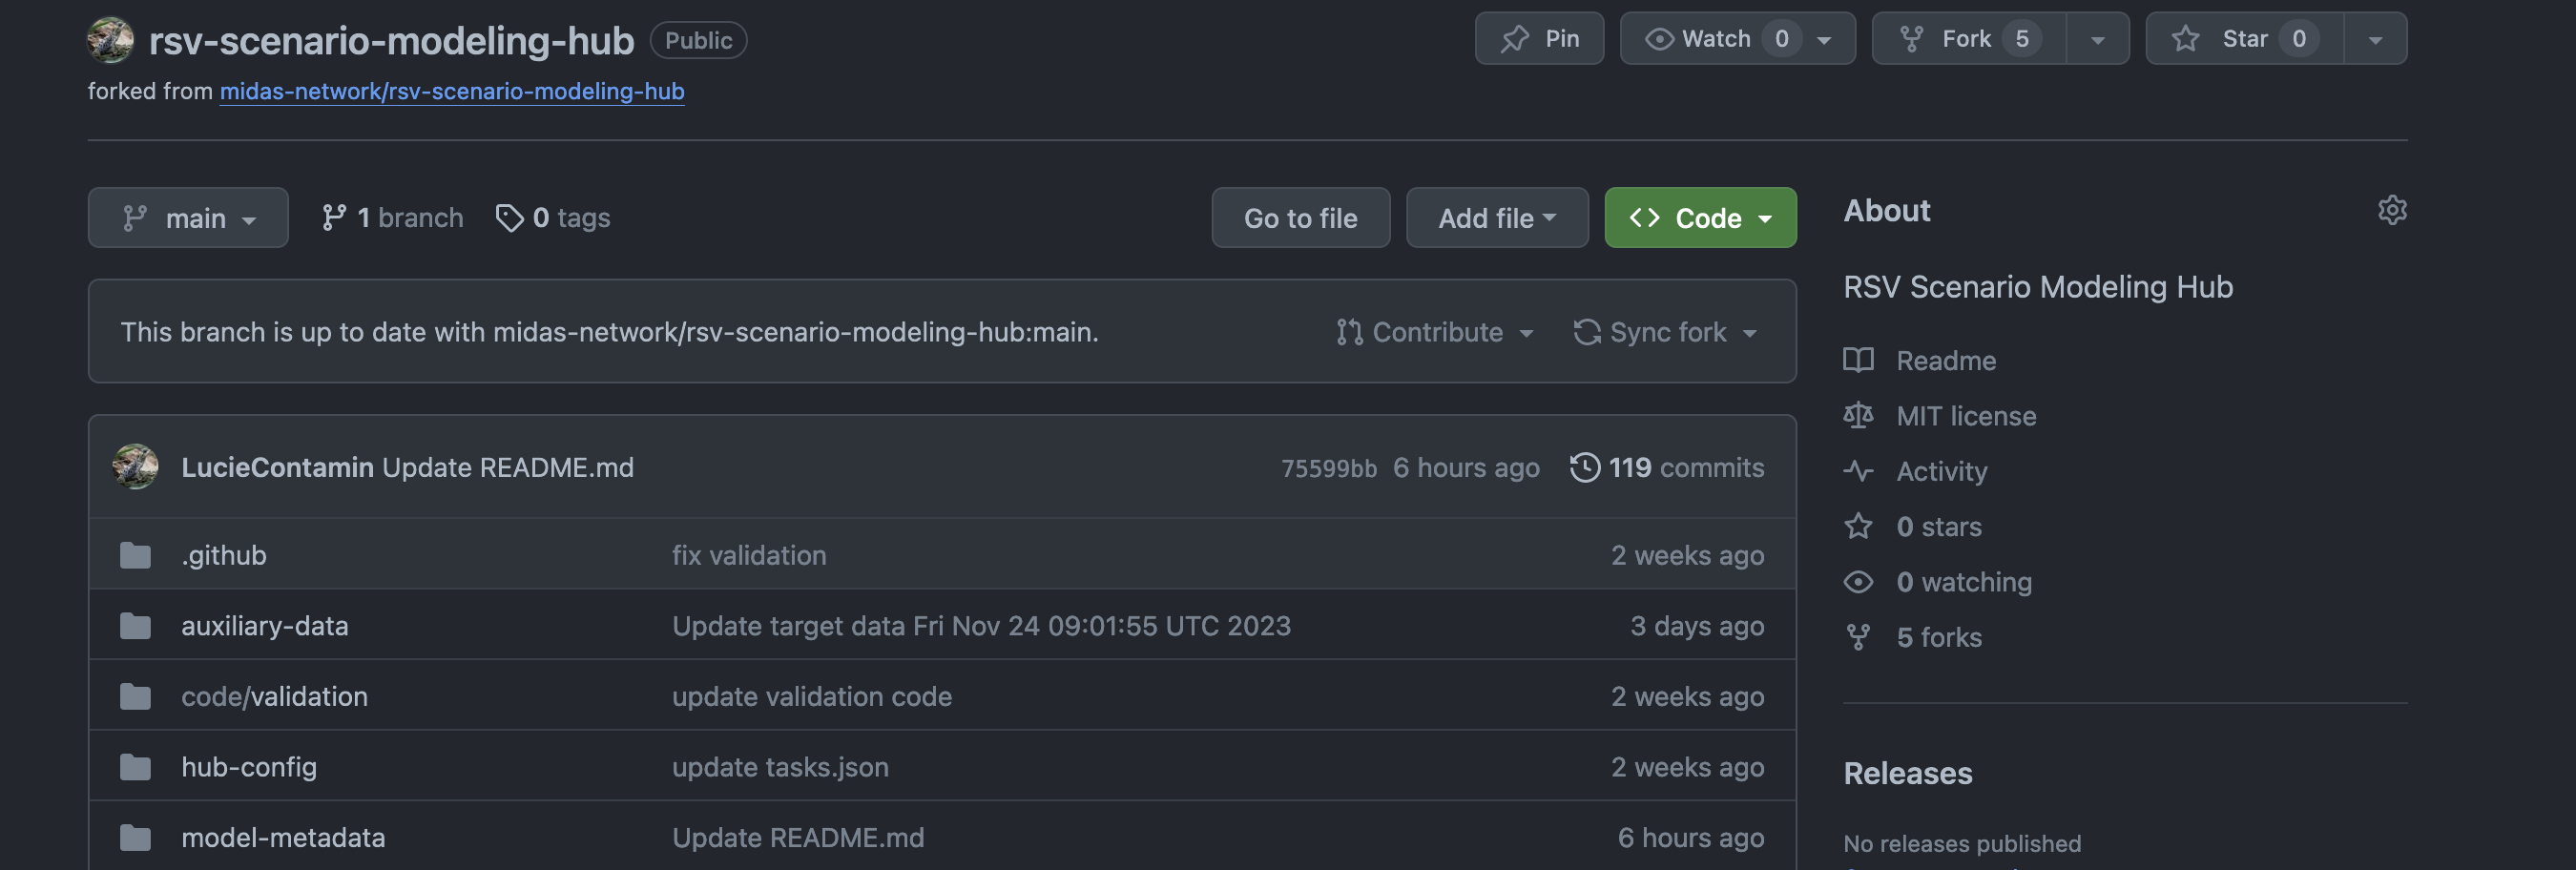
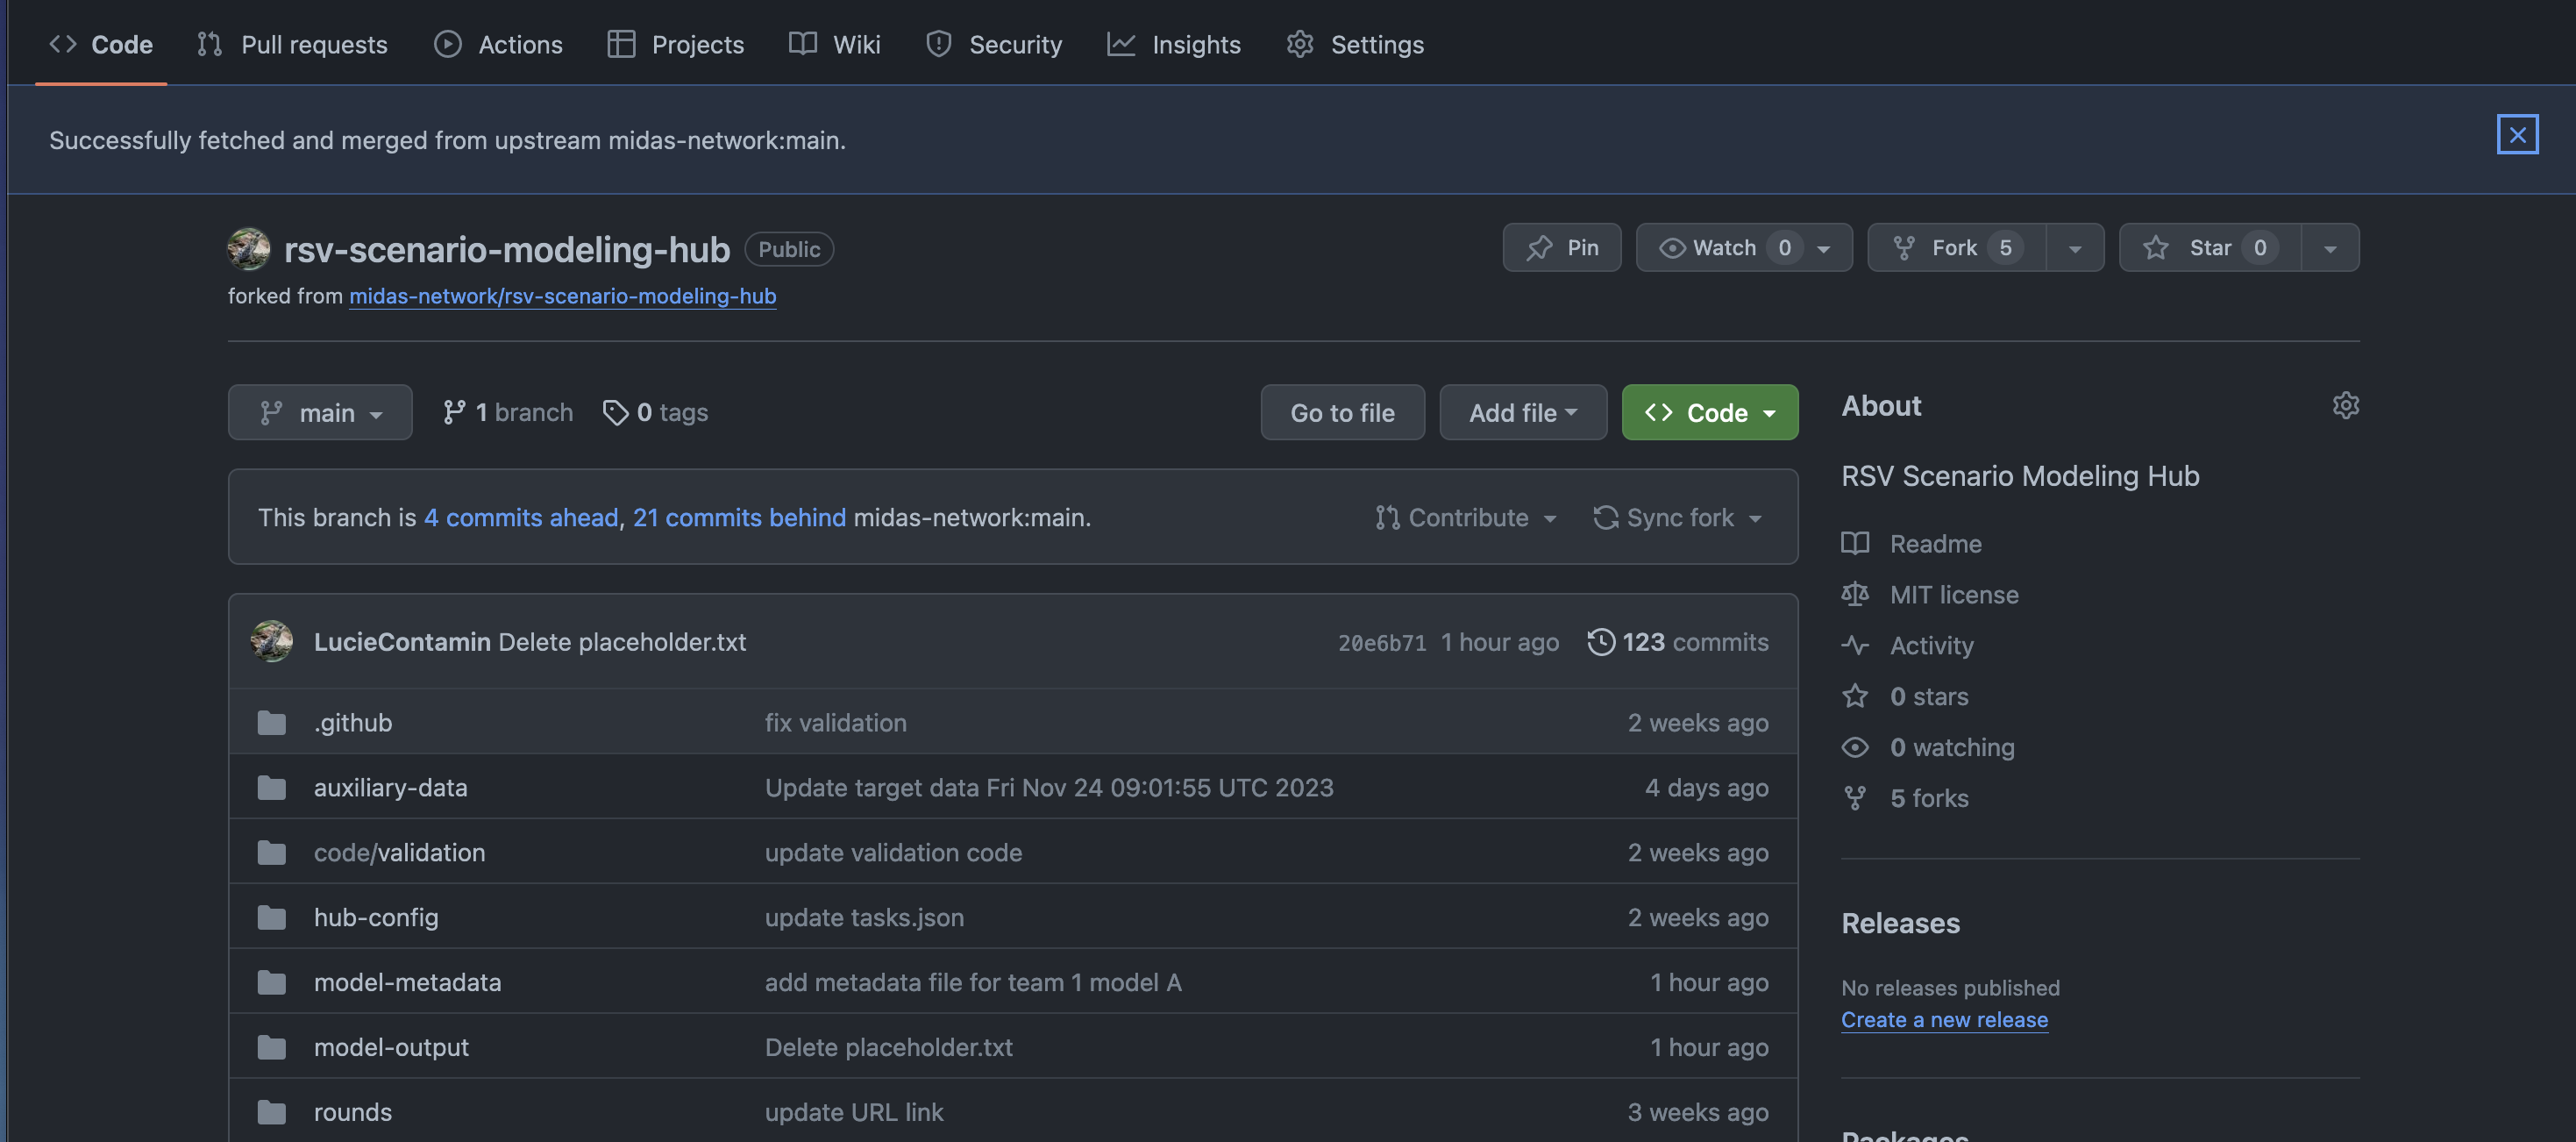
After few moments, a new page will open to the new fork repository on your account.
On the top left of the repo, you should see the name of the repository with “forked
from midas-network/rsv-scenario-modeling-hub”.
Once the fork repository is created, you can make all the modification in it
(the repository is accessible in your account, via the address:
https://github.com/<YOUR-ACCOUNT>/rsv-scenario-modeling-hub)
Additional resources
For more information on fork, please consult the GitHub documentation:
2. Create a New Subdirectory
The projection file should be submitted in a folder named with the team and model
abbreviation in the model-output/ folder.
For more information on the folder and submission file format, please consult the associated README available in the associated GitHub Repository.
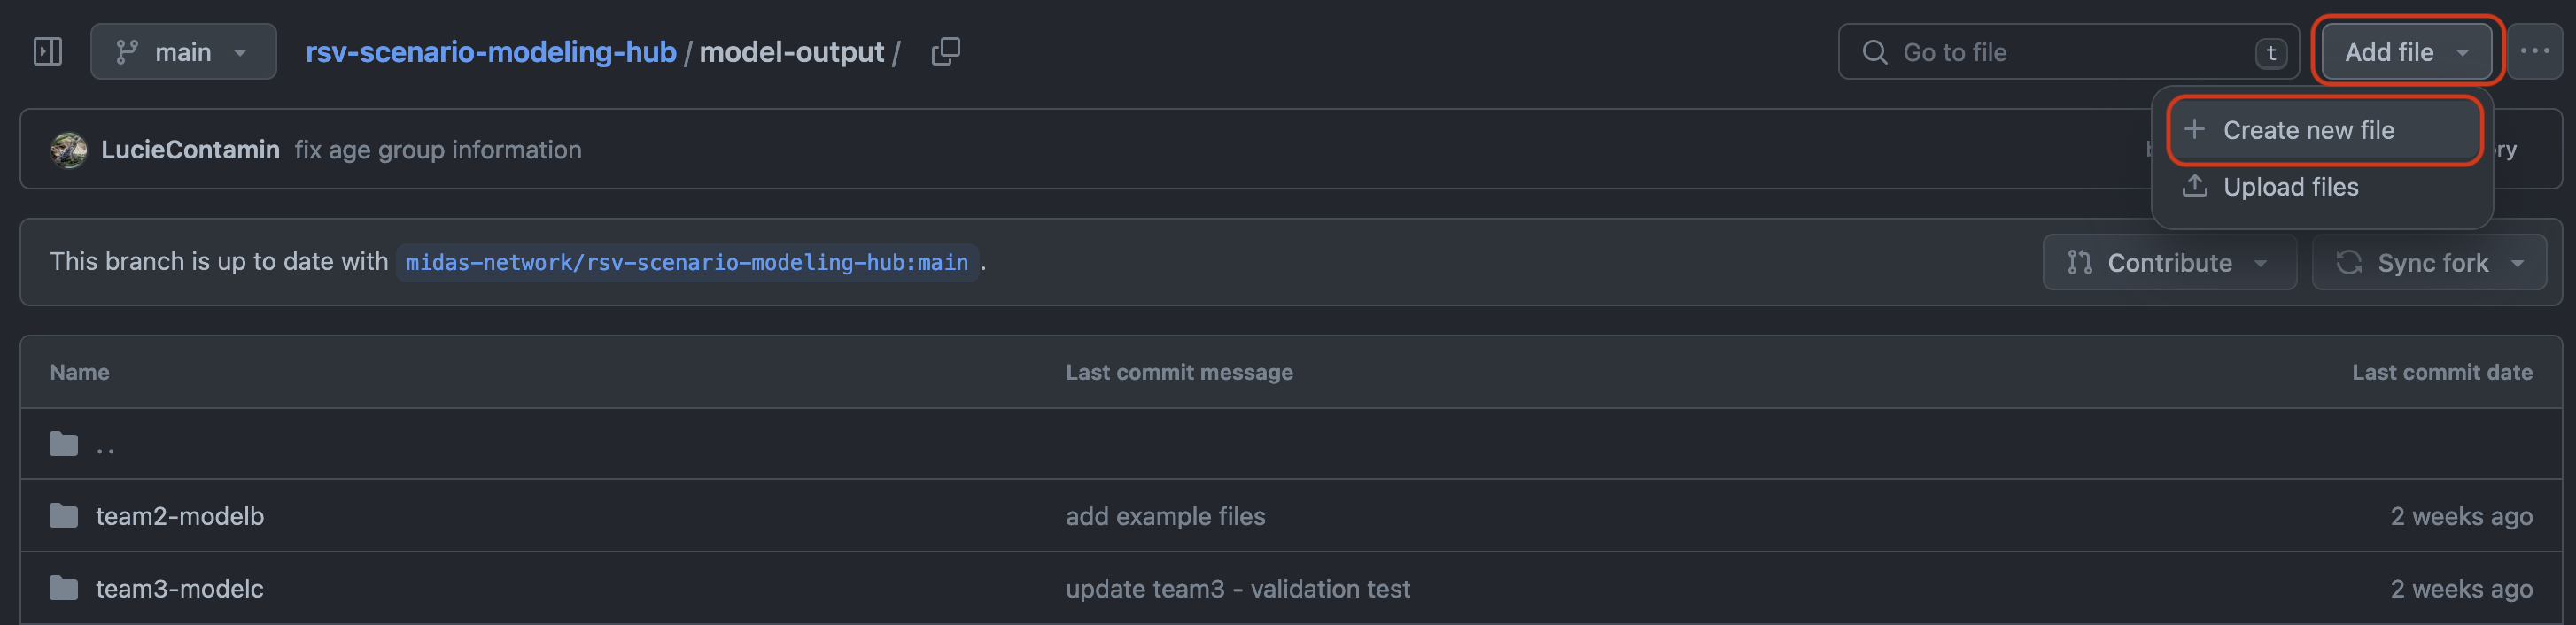
To create a new subdirectory, go to the model-output/ folder in your
forked repo and click on “Add file” > “Create new file” on the top left.
This will open a new page with an empty file and a writable version of the
directory on top of the empty file. Please fill the directory with your team and
model abbreviation (should be used in all your files):
rsv-scenario-modeling-hub/model-output/<TEAM-MODEL>.
For example team1-modela in the picture

Add a “/” at the end of your directory, and it should transform it as a
subdirectory. You can name the file as “placeholder.txt”, for example (will be
removed later).

You can save the change by committing the change by clicking on the green
“commit changes …” button. Feel free to edit the commit message. This message
should be a short text describing the change you made. You can then complete
your change by clicking on “commit change”

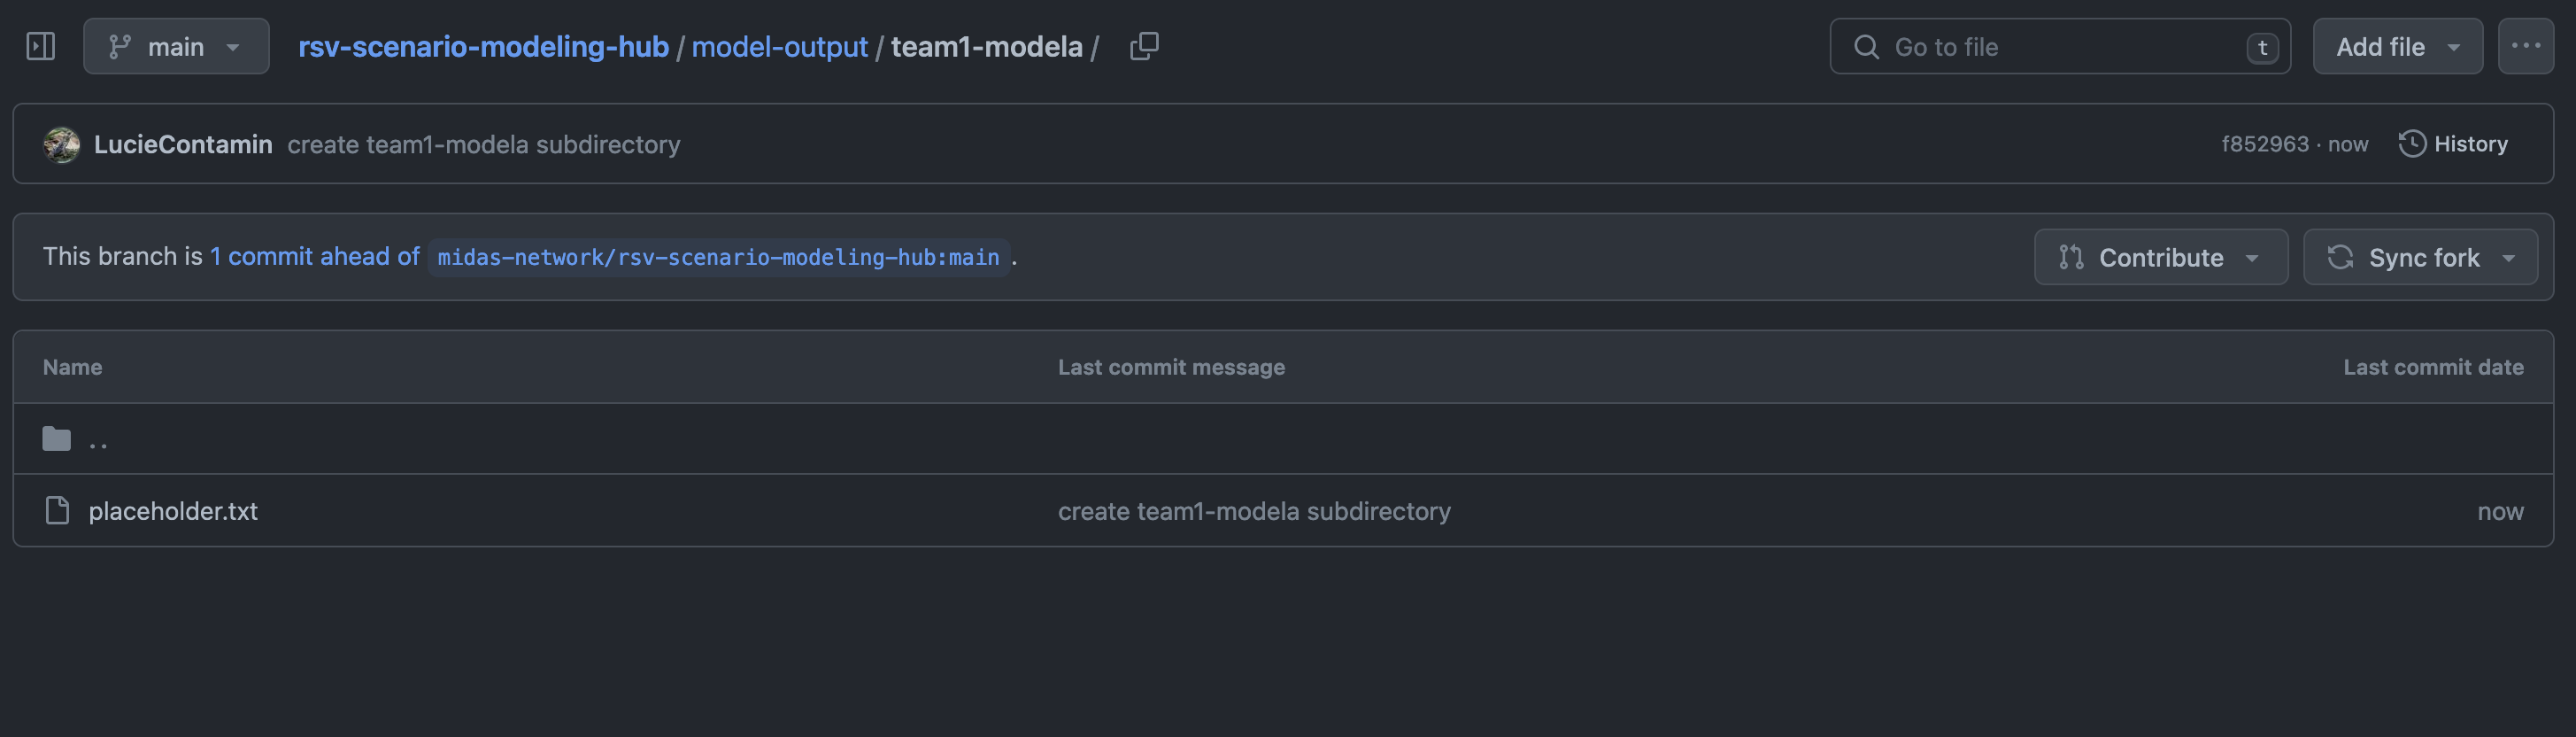
This will redirect you to a new page with your new subdirectory and your
placeholder file. You can see the full path of the new subdirectory on the top
and the content of your subdirectory below.
3. Upload Files
The next step is to upload the required files. Please go to the folder of interest:
- For the model output, your team specific subdirectory in the
model-output/folder (created in the previous step) and click on “Add file” > “Upload files”.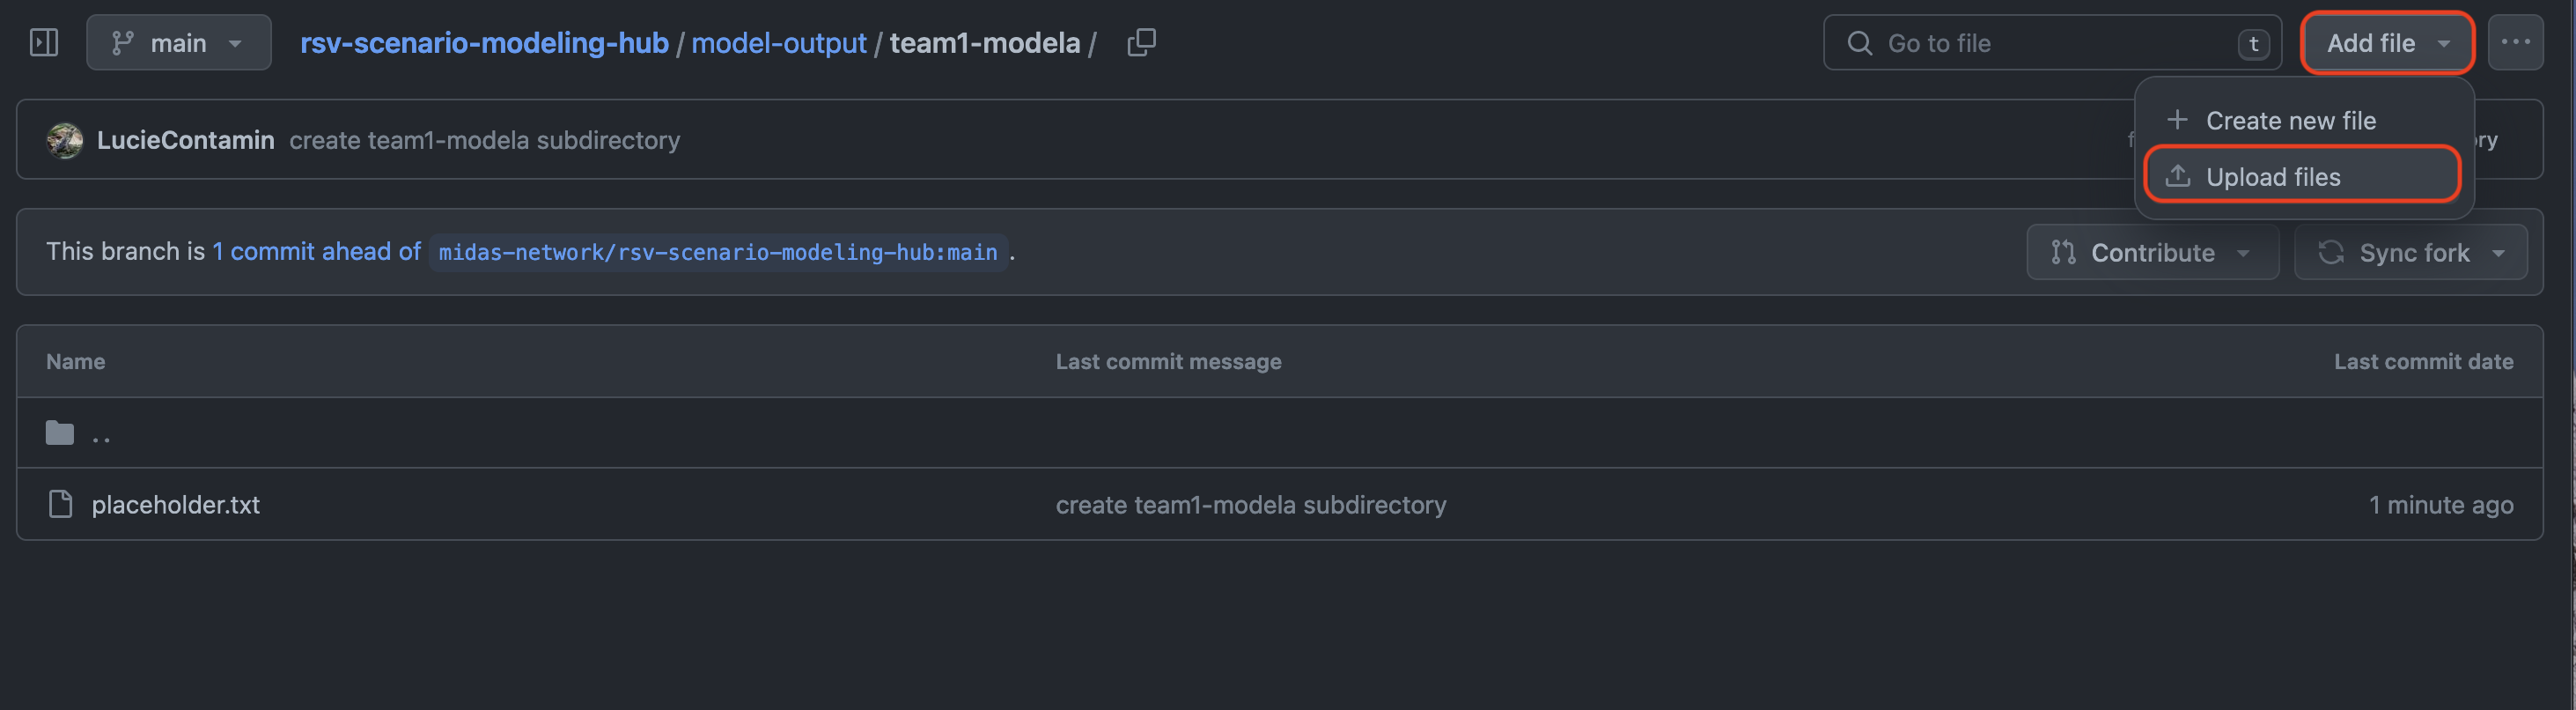
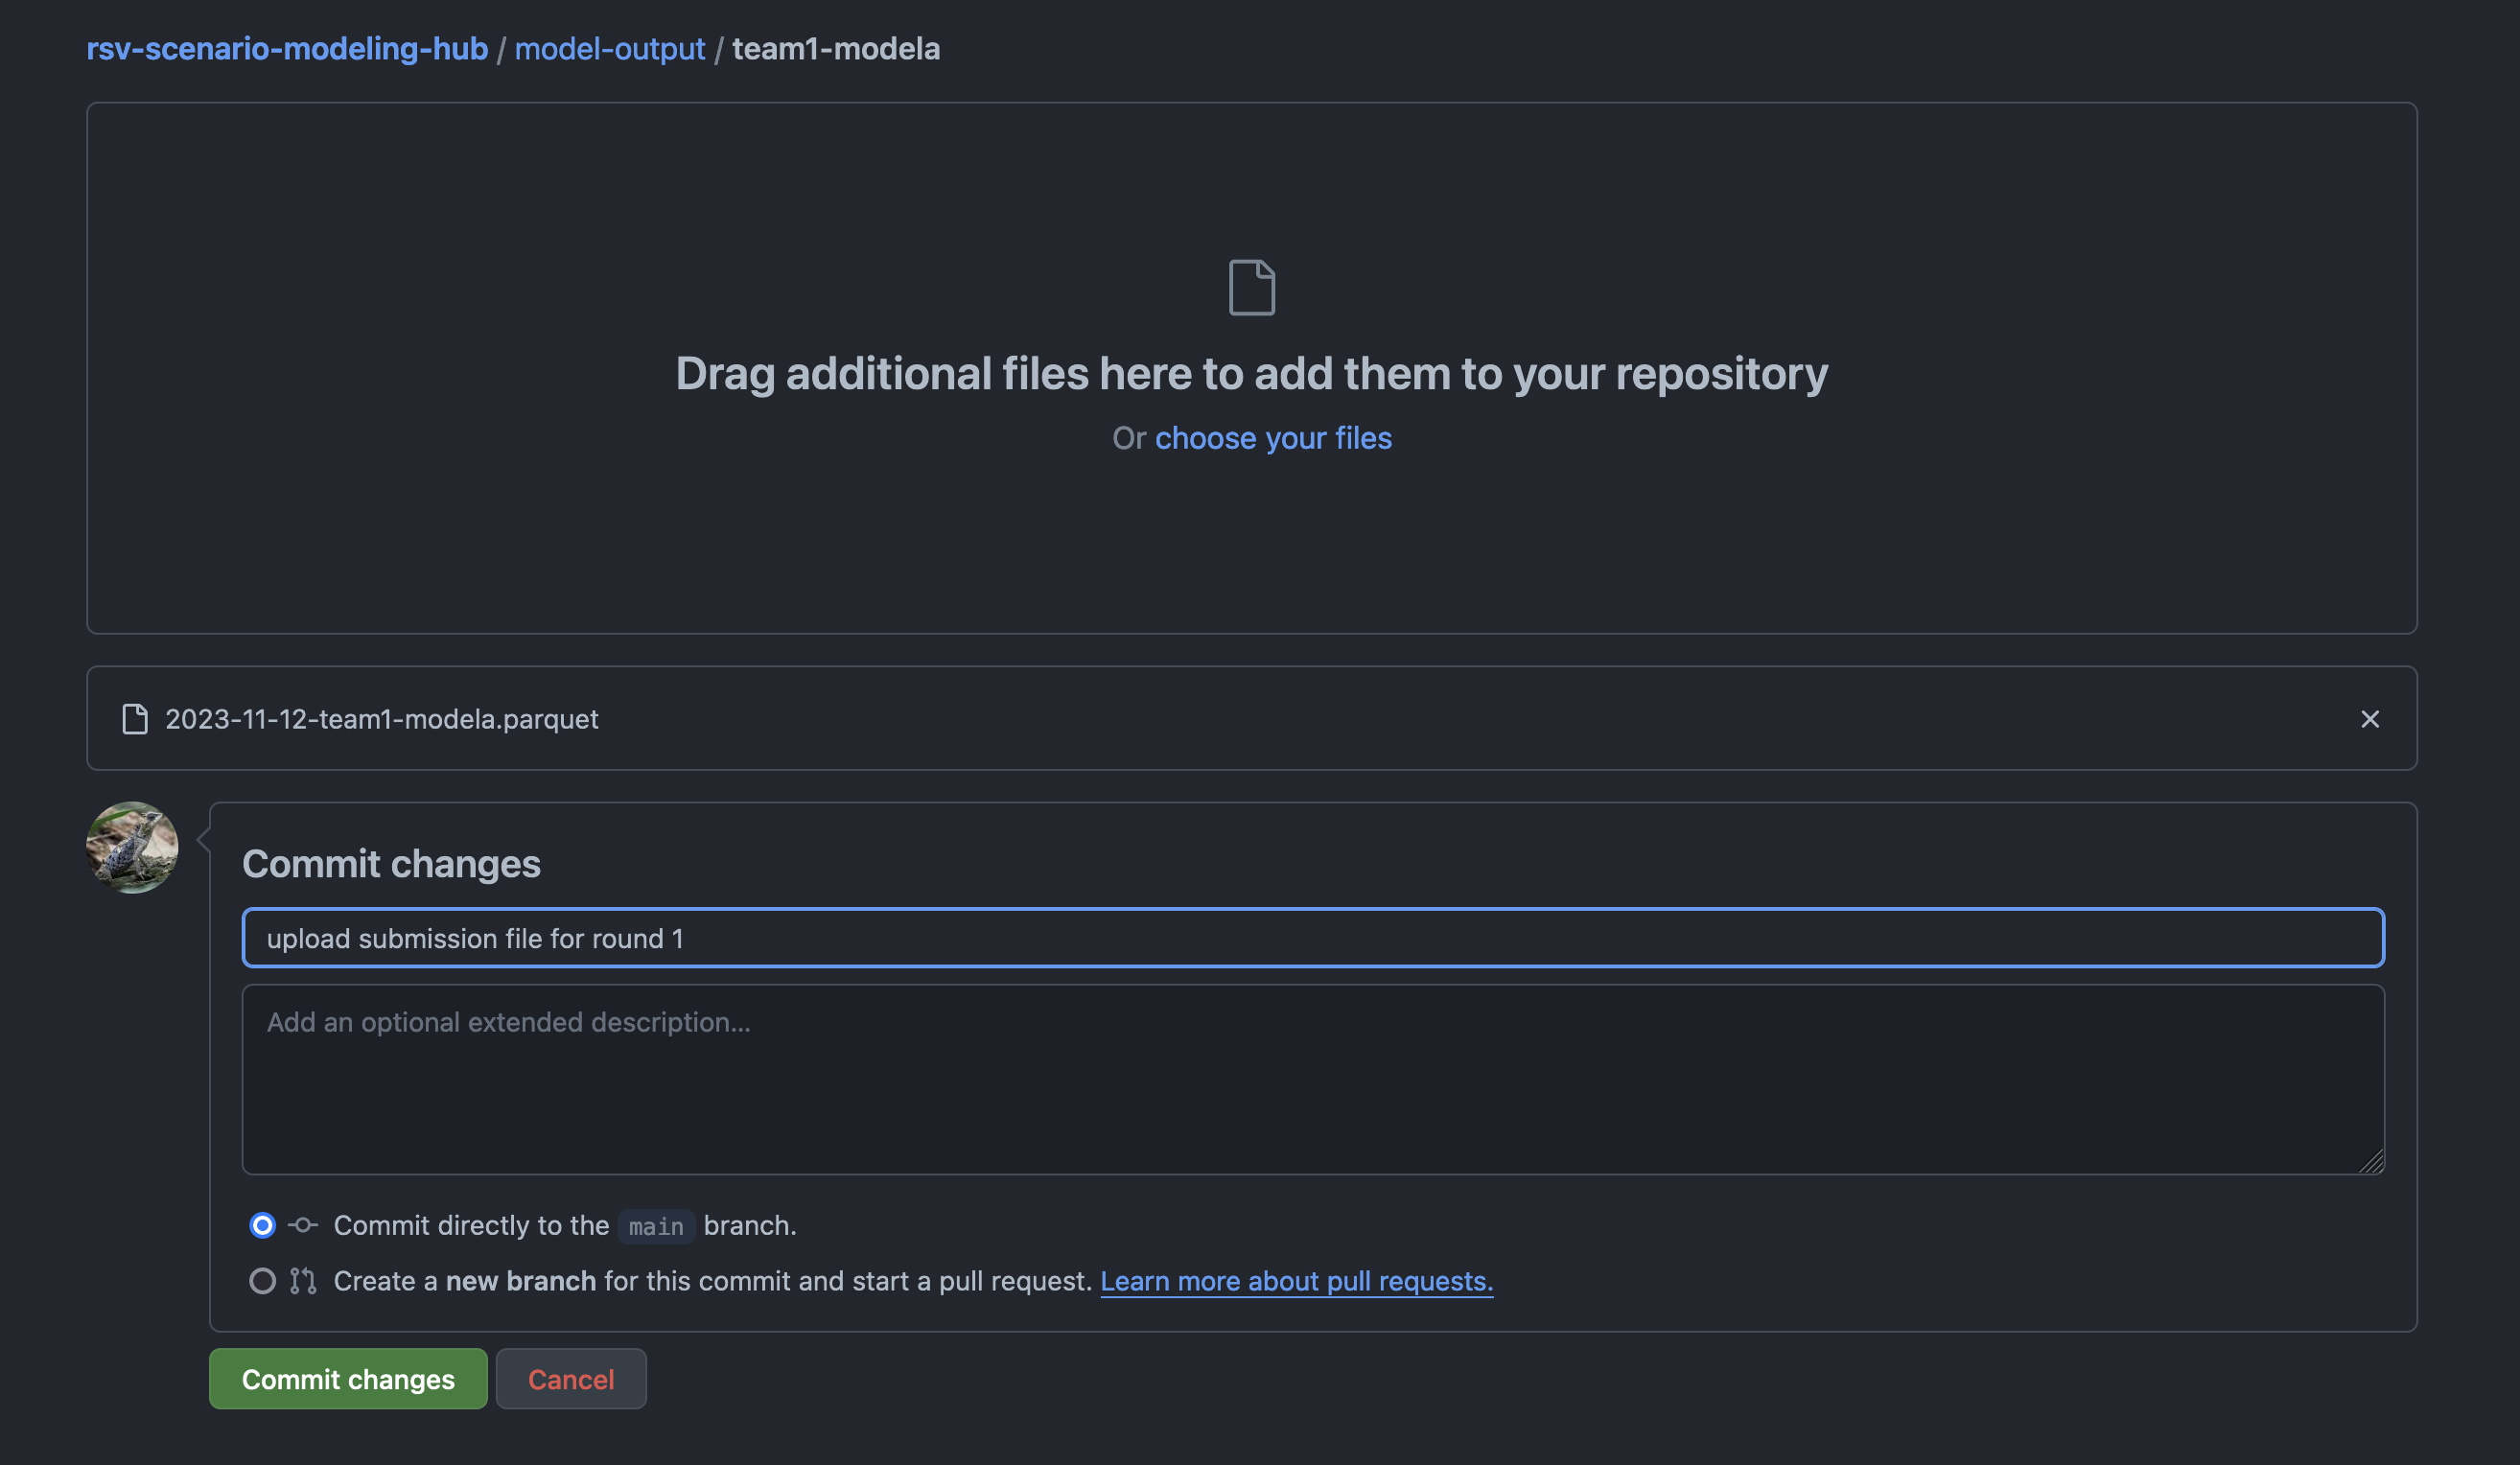
Drag or click on “choose your files” to upload the file, and validate the change by
clicking on “Commit changes”. Please feel free to edit the commit messages, as
in the example below.
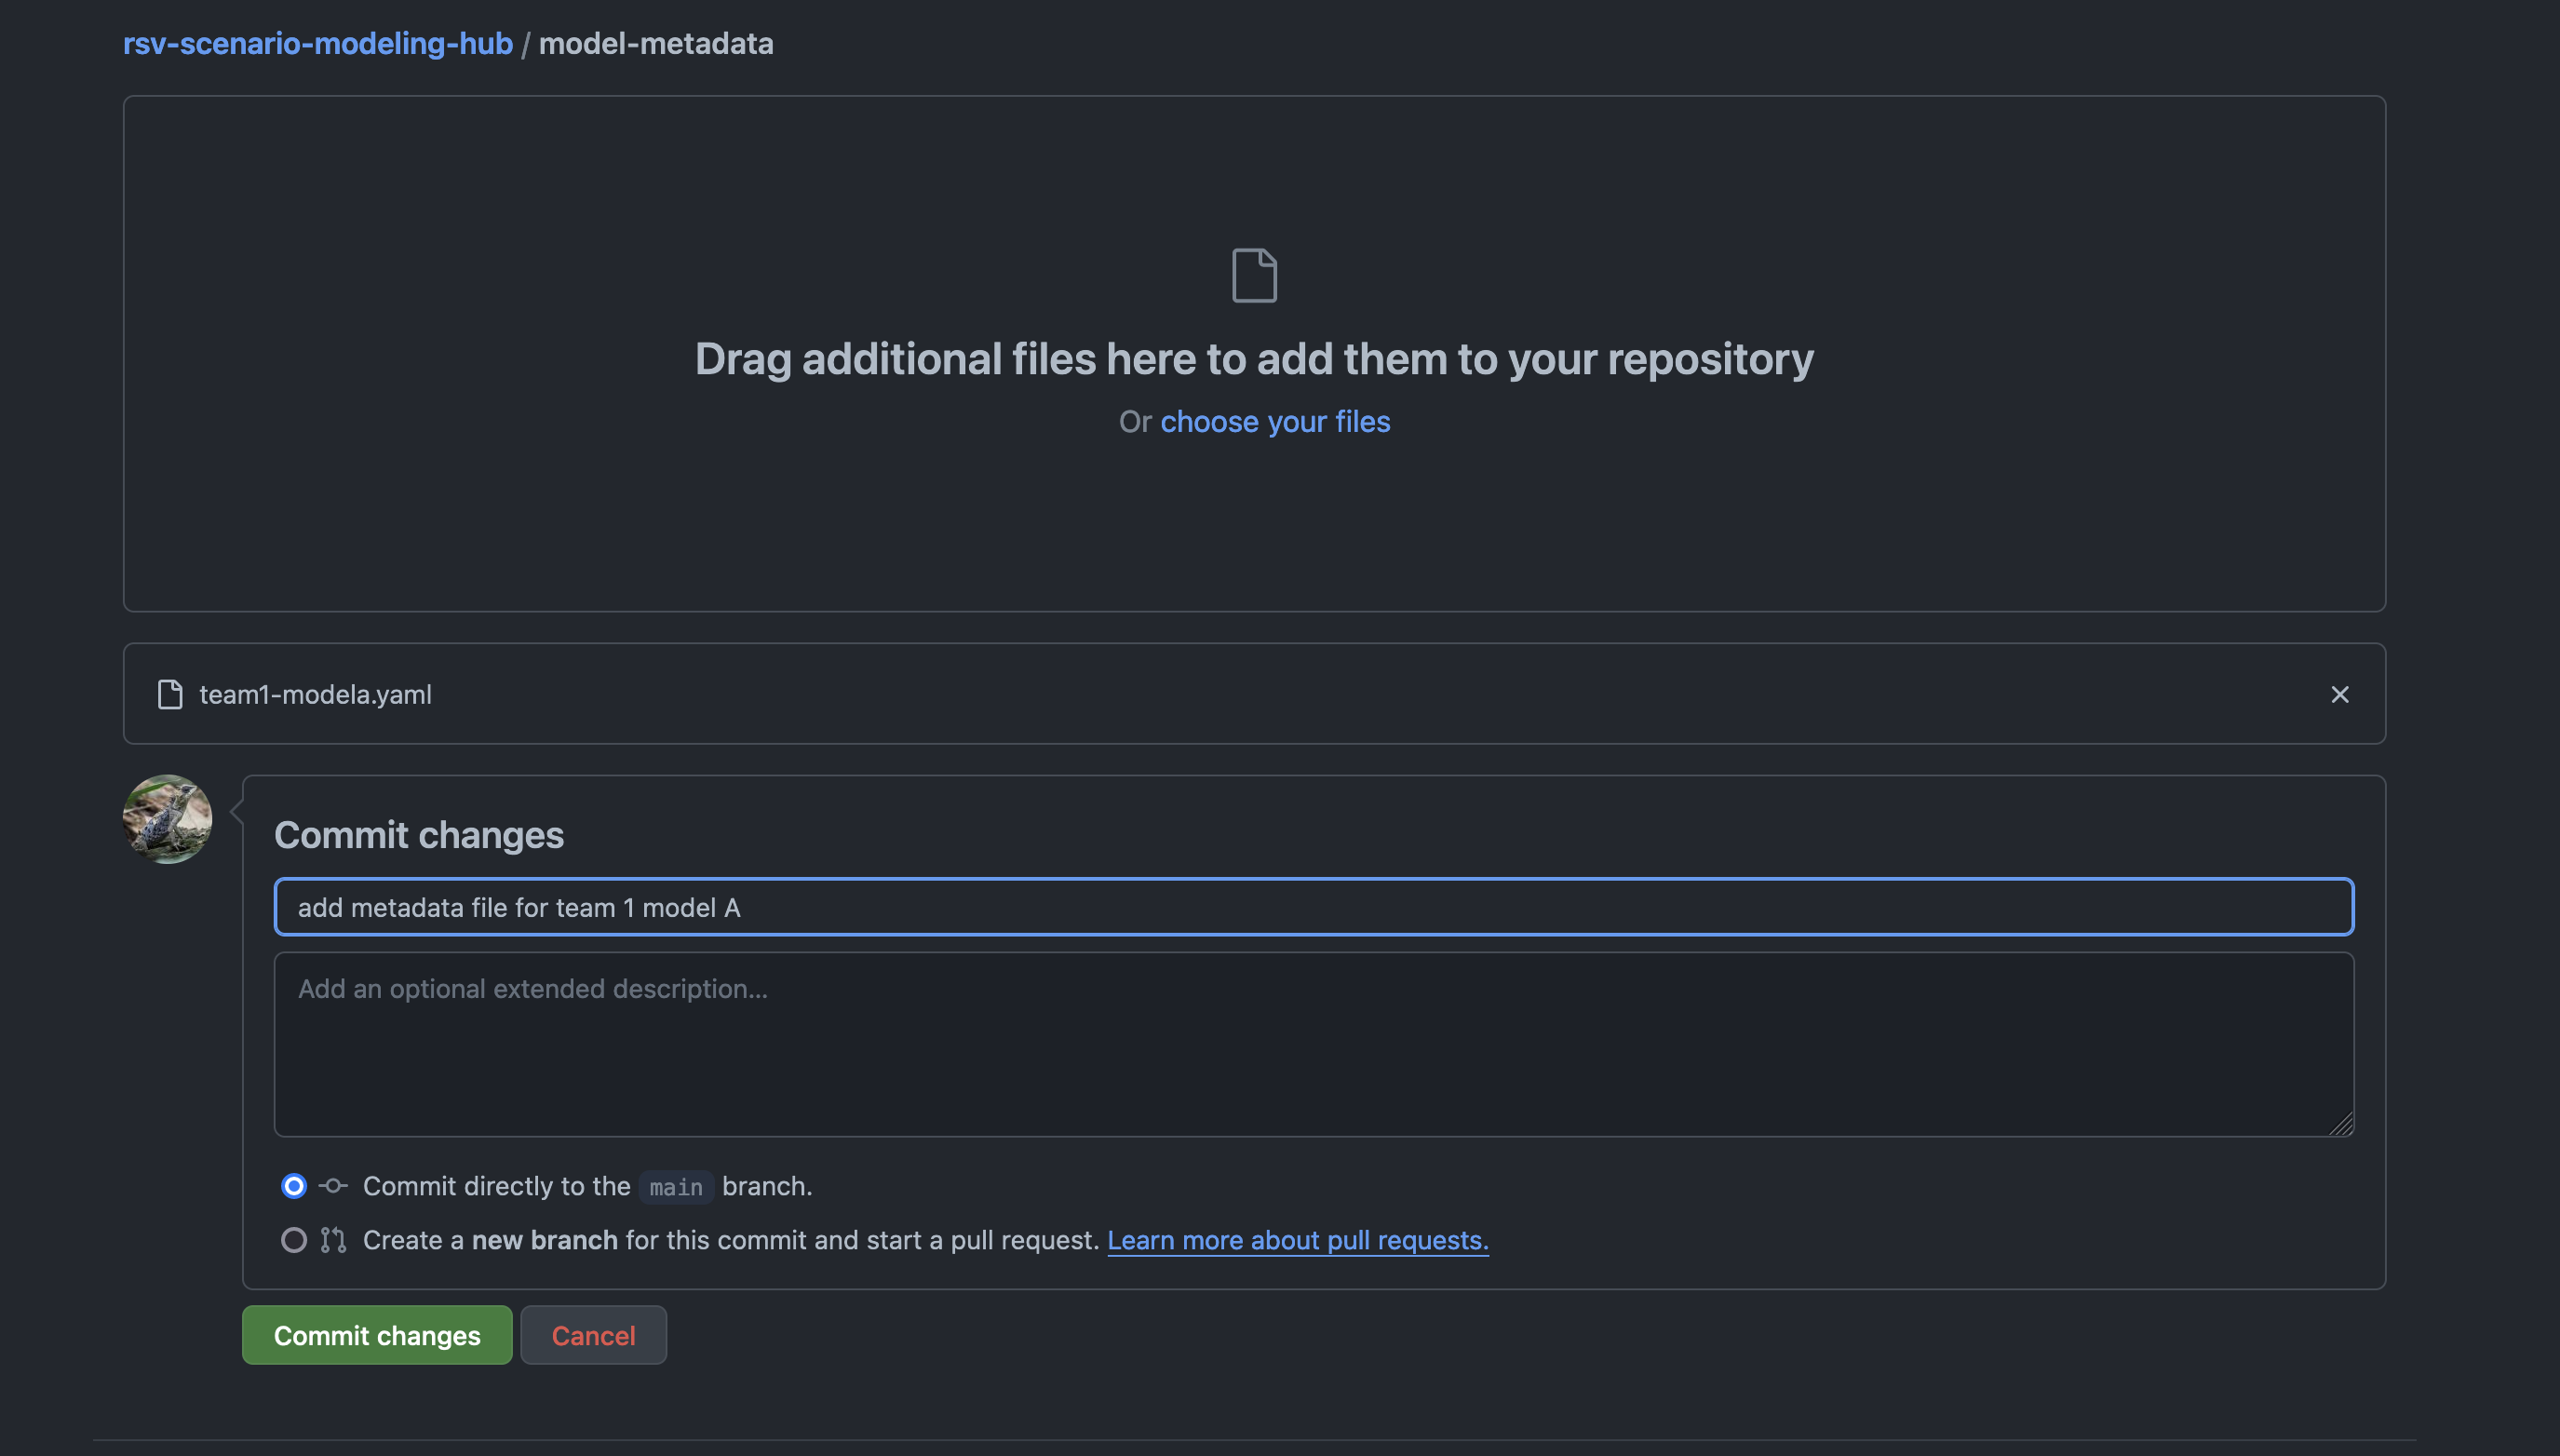
- For the metadata file, the
model-metadata/folder and click on “Add file” > “Upload files”.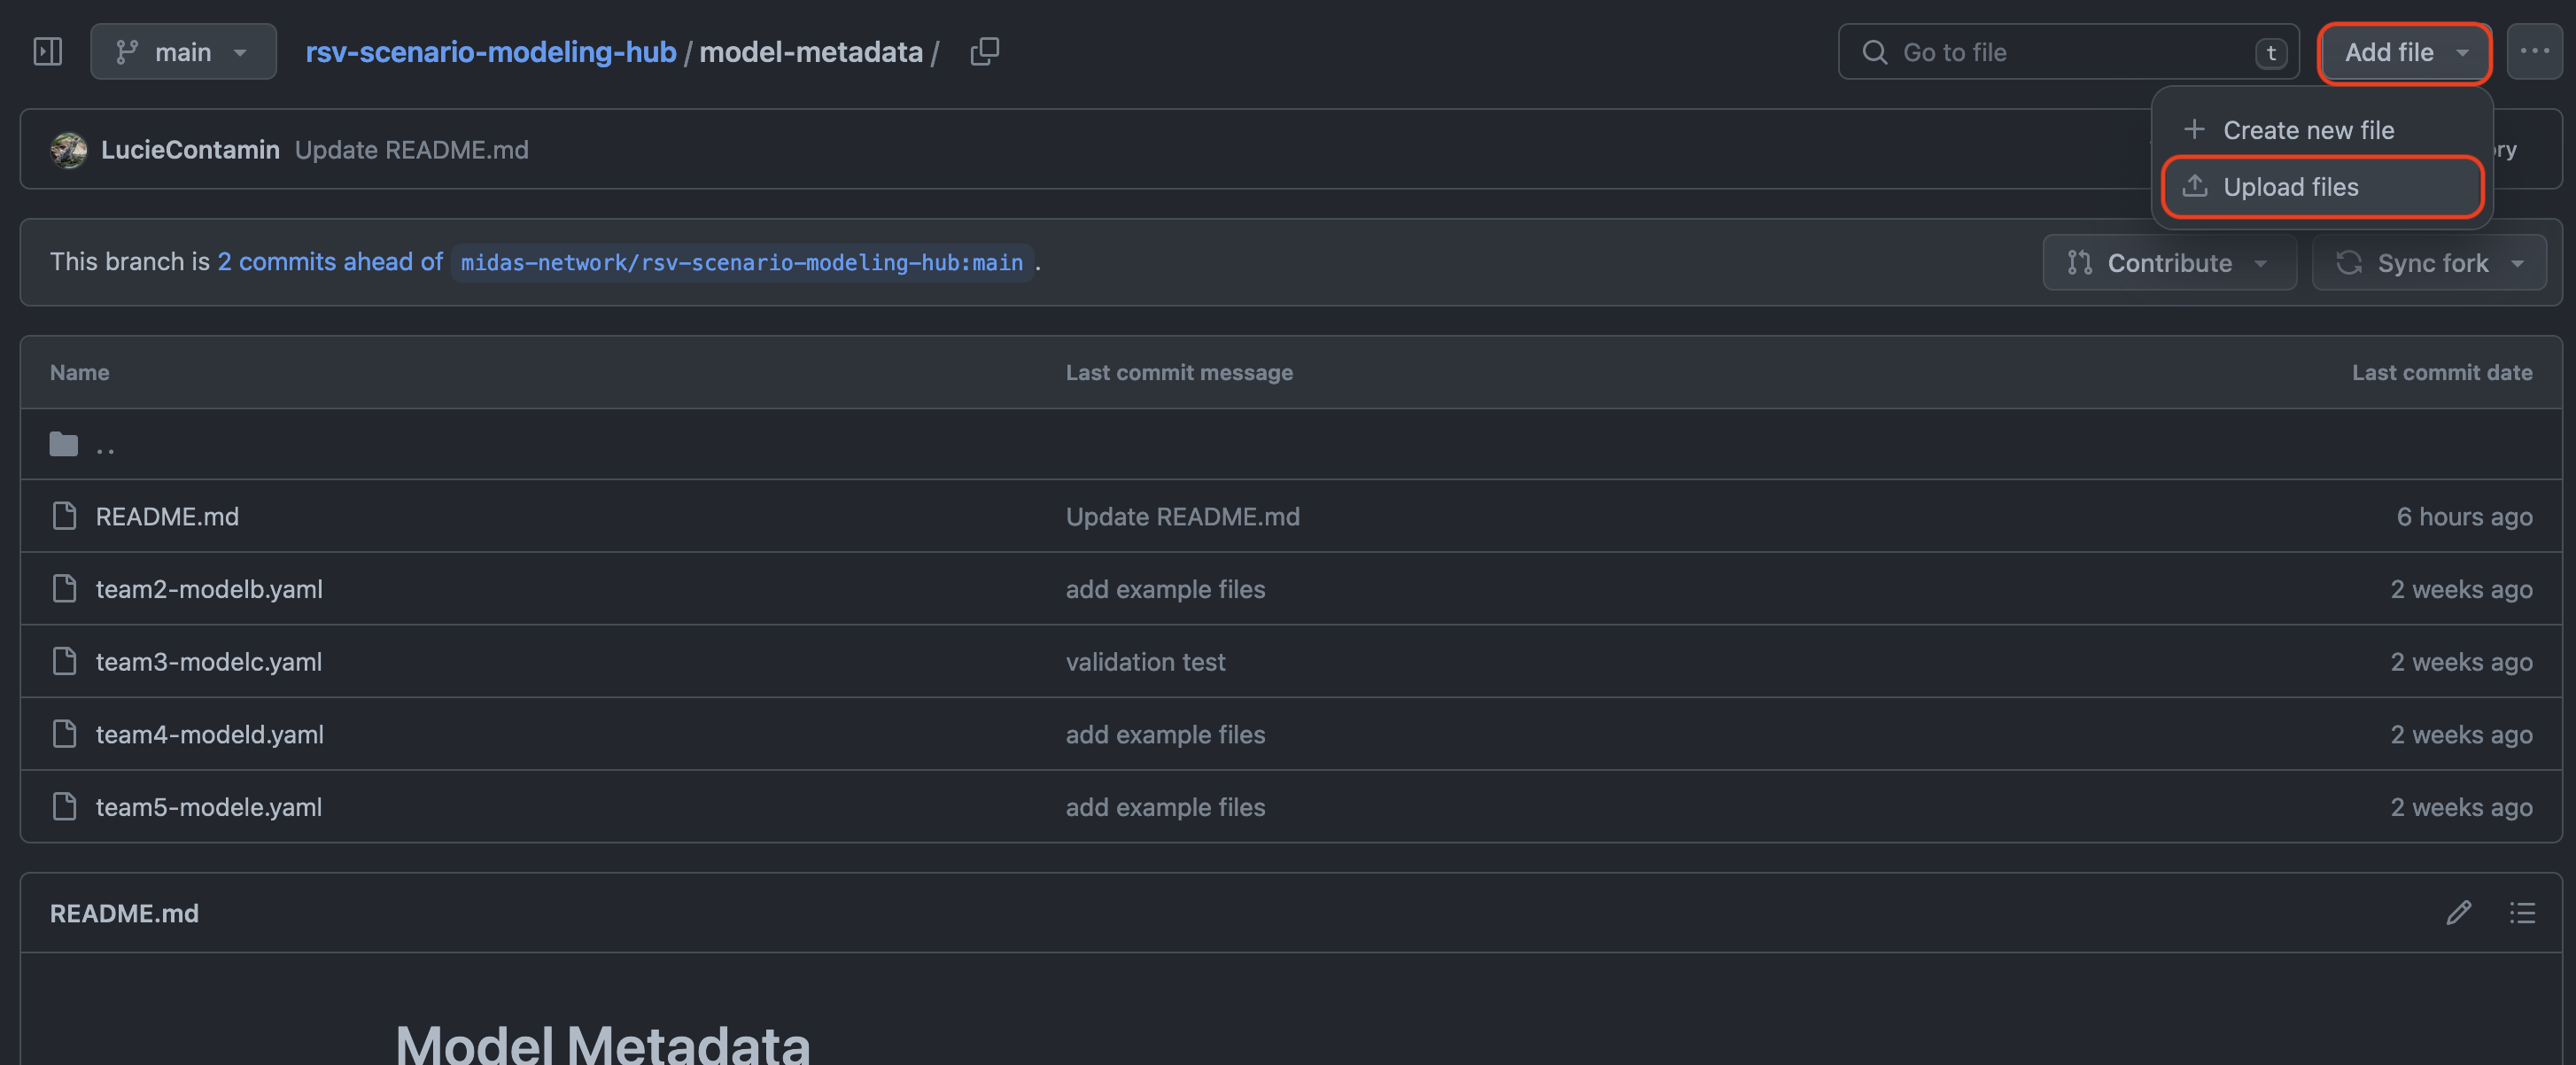
Drag or click on “choose your files” to upload the file, and validate the change
by clicking on “Commit changes”. Please feel free to edit the commit messages,
as in the example below.
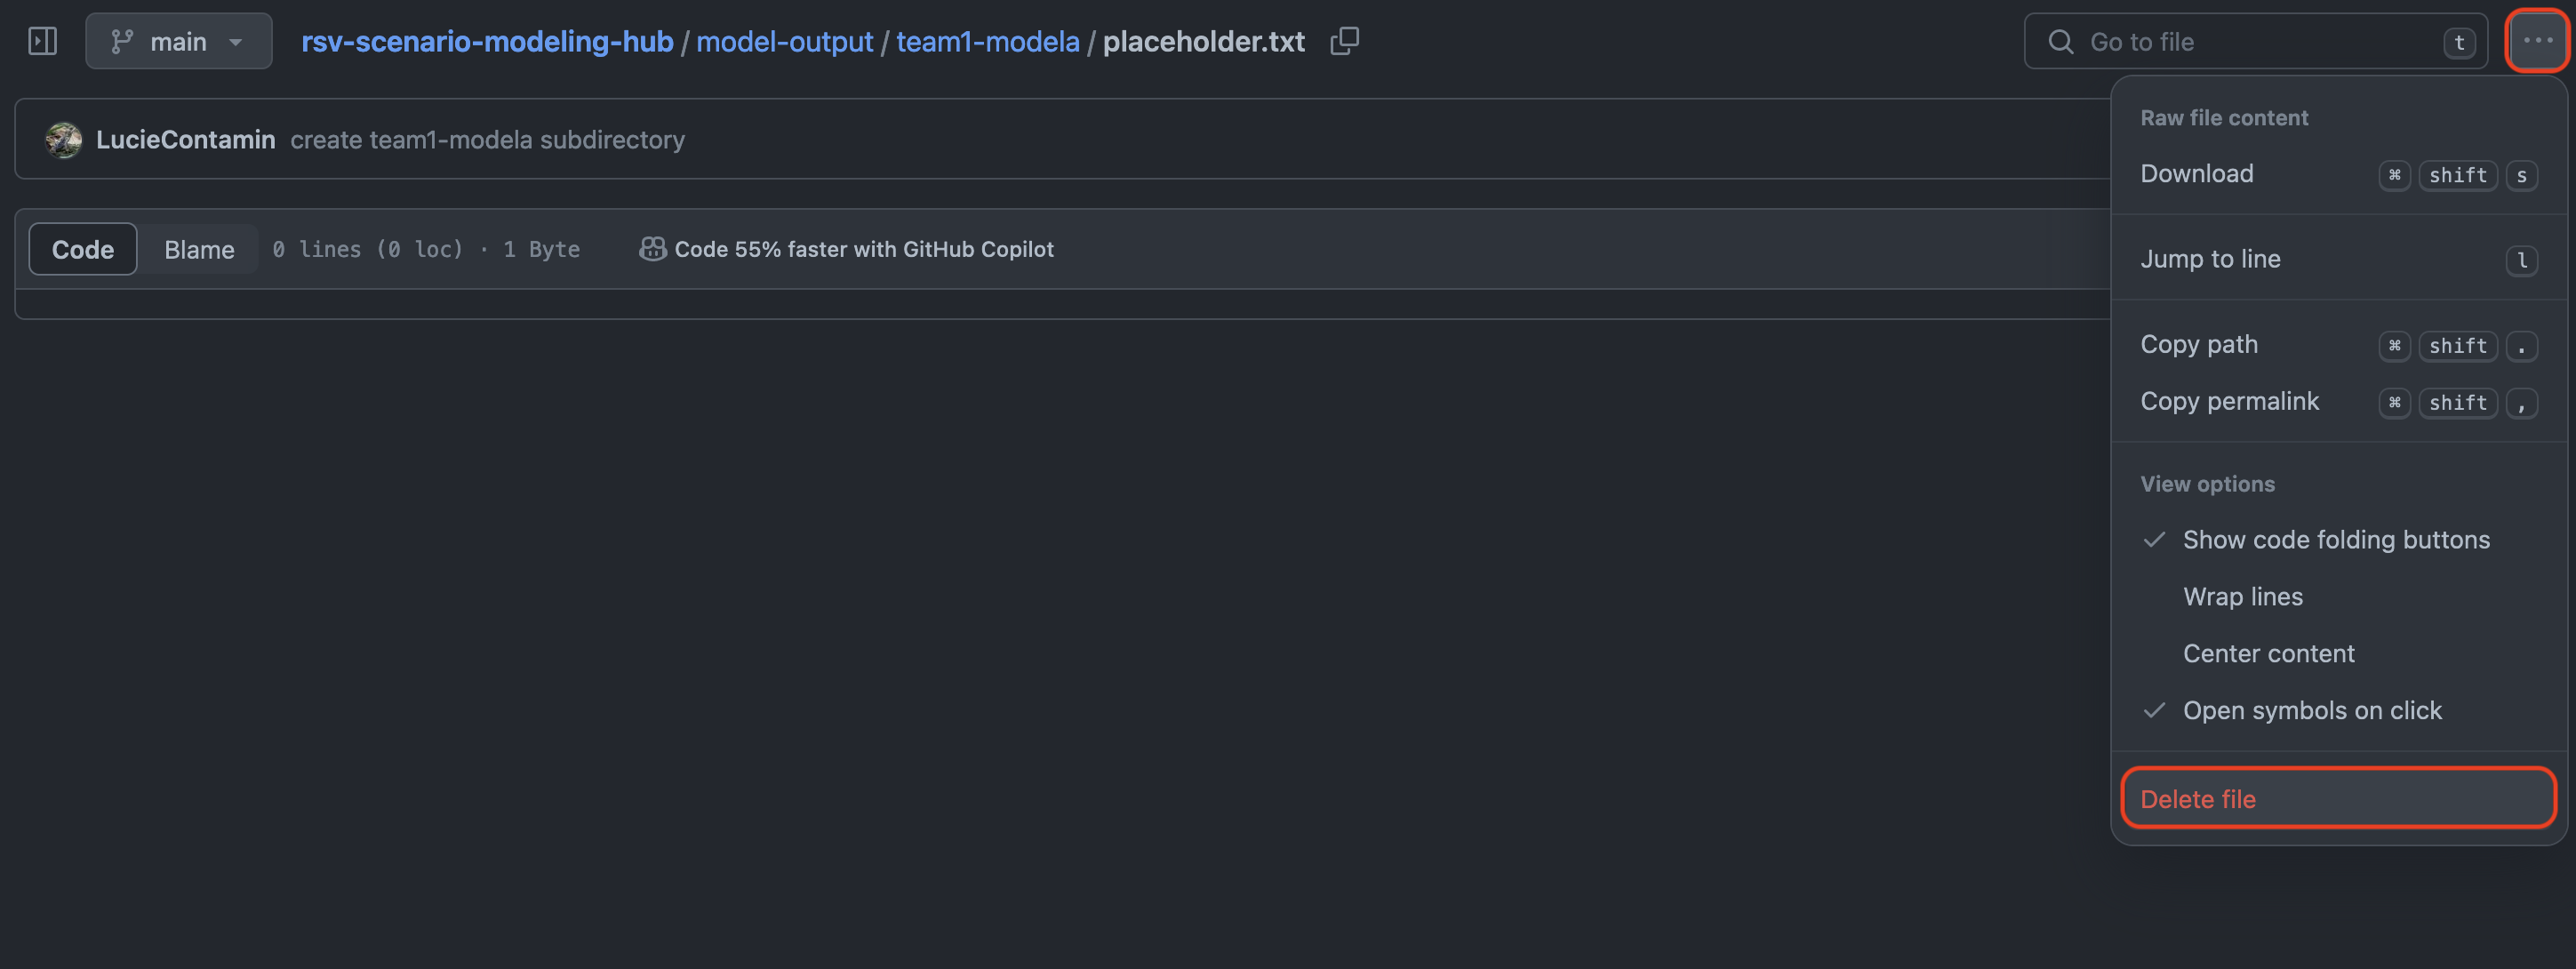
Delete a file
To delete a file, for example the "placeholder.txt" files, go to the file and
click on "..." > "Delete file" and validate the change.
For more documentation on adding and deleting file, please consult:
4. Submit projections via a Pull-Request
Once the repository is updated with your submission files, you can submit your files via a Pull-Request. A Pull-Request (PR) is a mechanism to propose change from a forked repository to the “initial” repository. Please consult the About pull requests documentation page for more information.
To open a PR, go to “Pull requests” on the top bar of your forked
repository.

This opens a page with all the PR history in your forked repository.
To open a PR, click on “New pull request”.

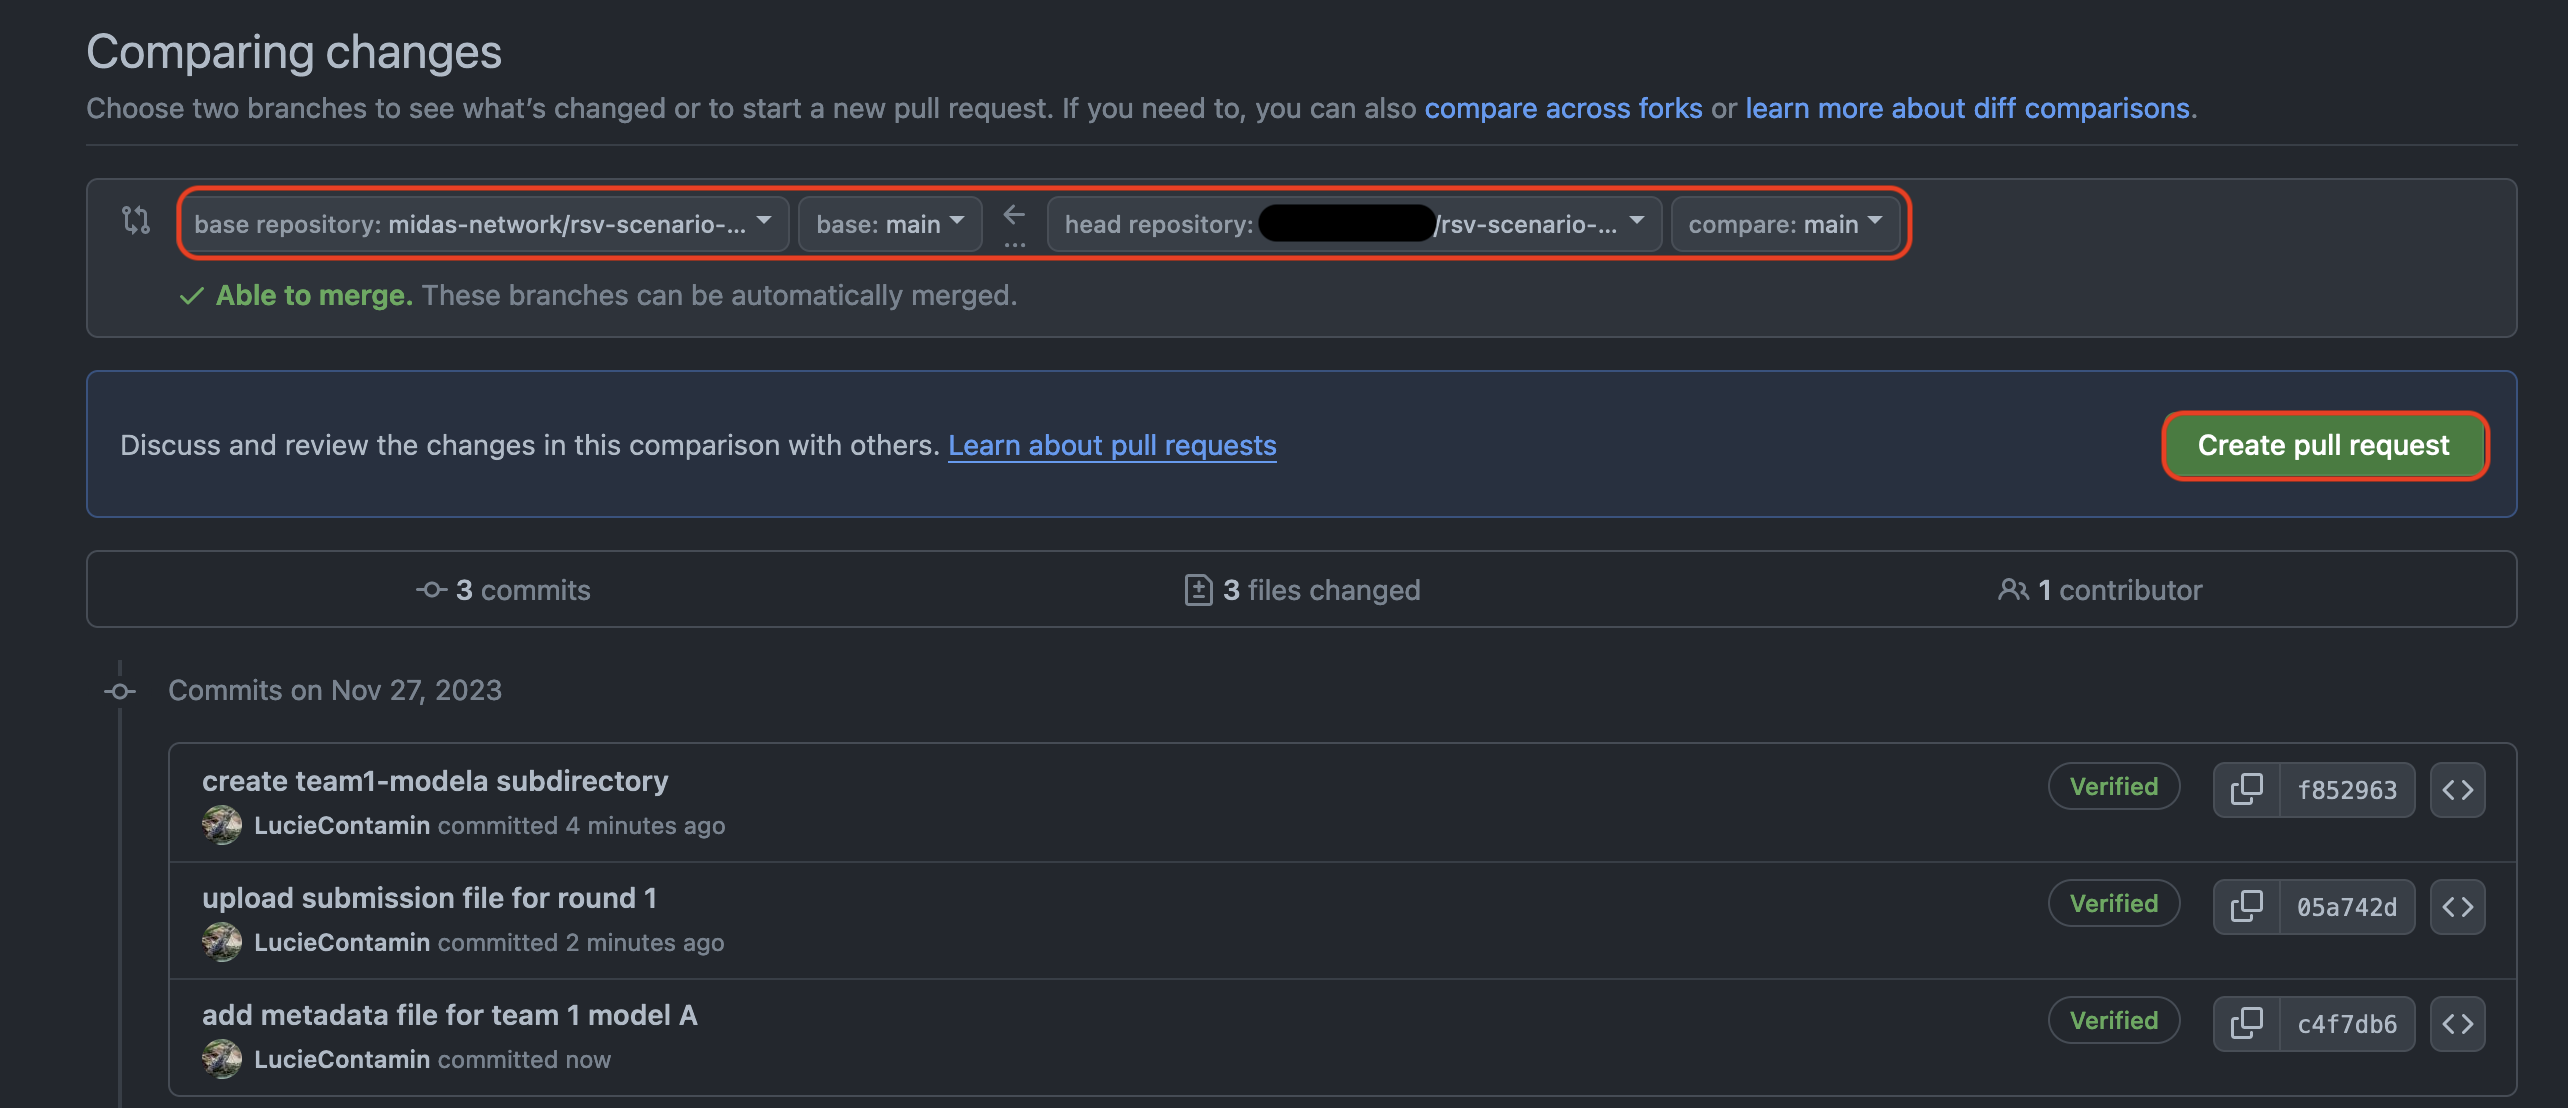
You will be directed to a new page in the initial repository (in the example:
midas-network/rsv-scenario-modeling-hub) with information about the
changes you made between the “initial” repository and your forked version.
Please verify that the top “base repository” information corresponds to:
midas-network/rsv-scenario-modeling-hub and “base” is set
to main. The “head repository” should correspond to your forked
repository:
<YOUR-ACCOUNT>/rsv-scenario-modeling-hub.
You can also see a list of all the changes you made in the page.
If all the information is correct, you can click on “Create pull request”.
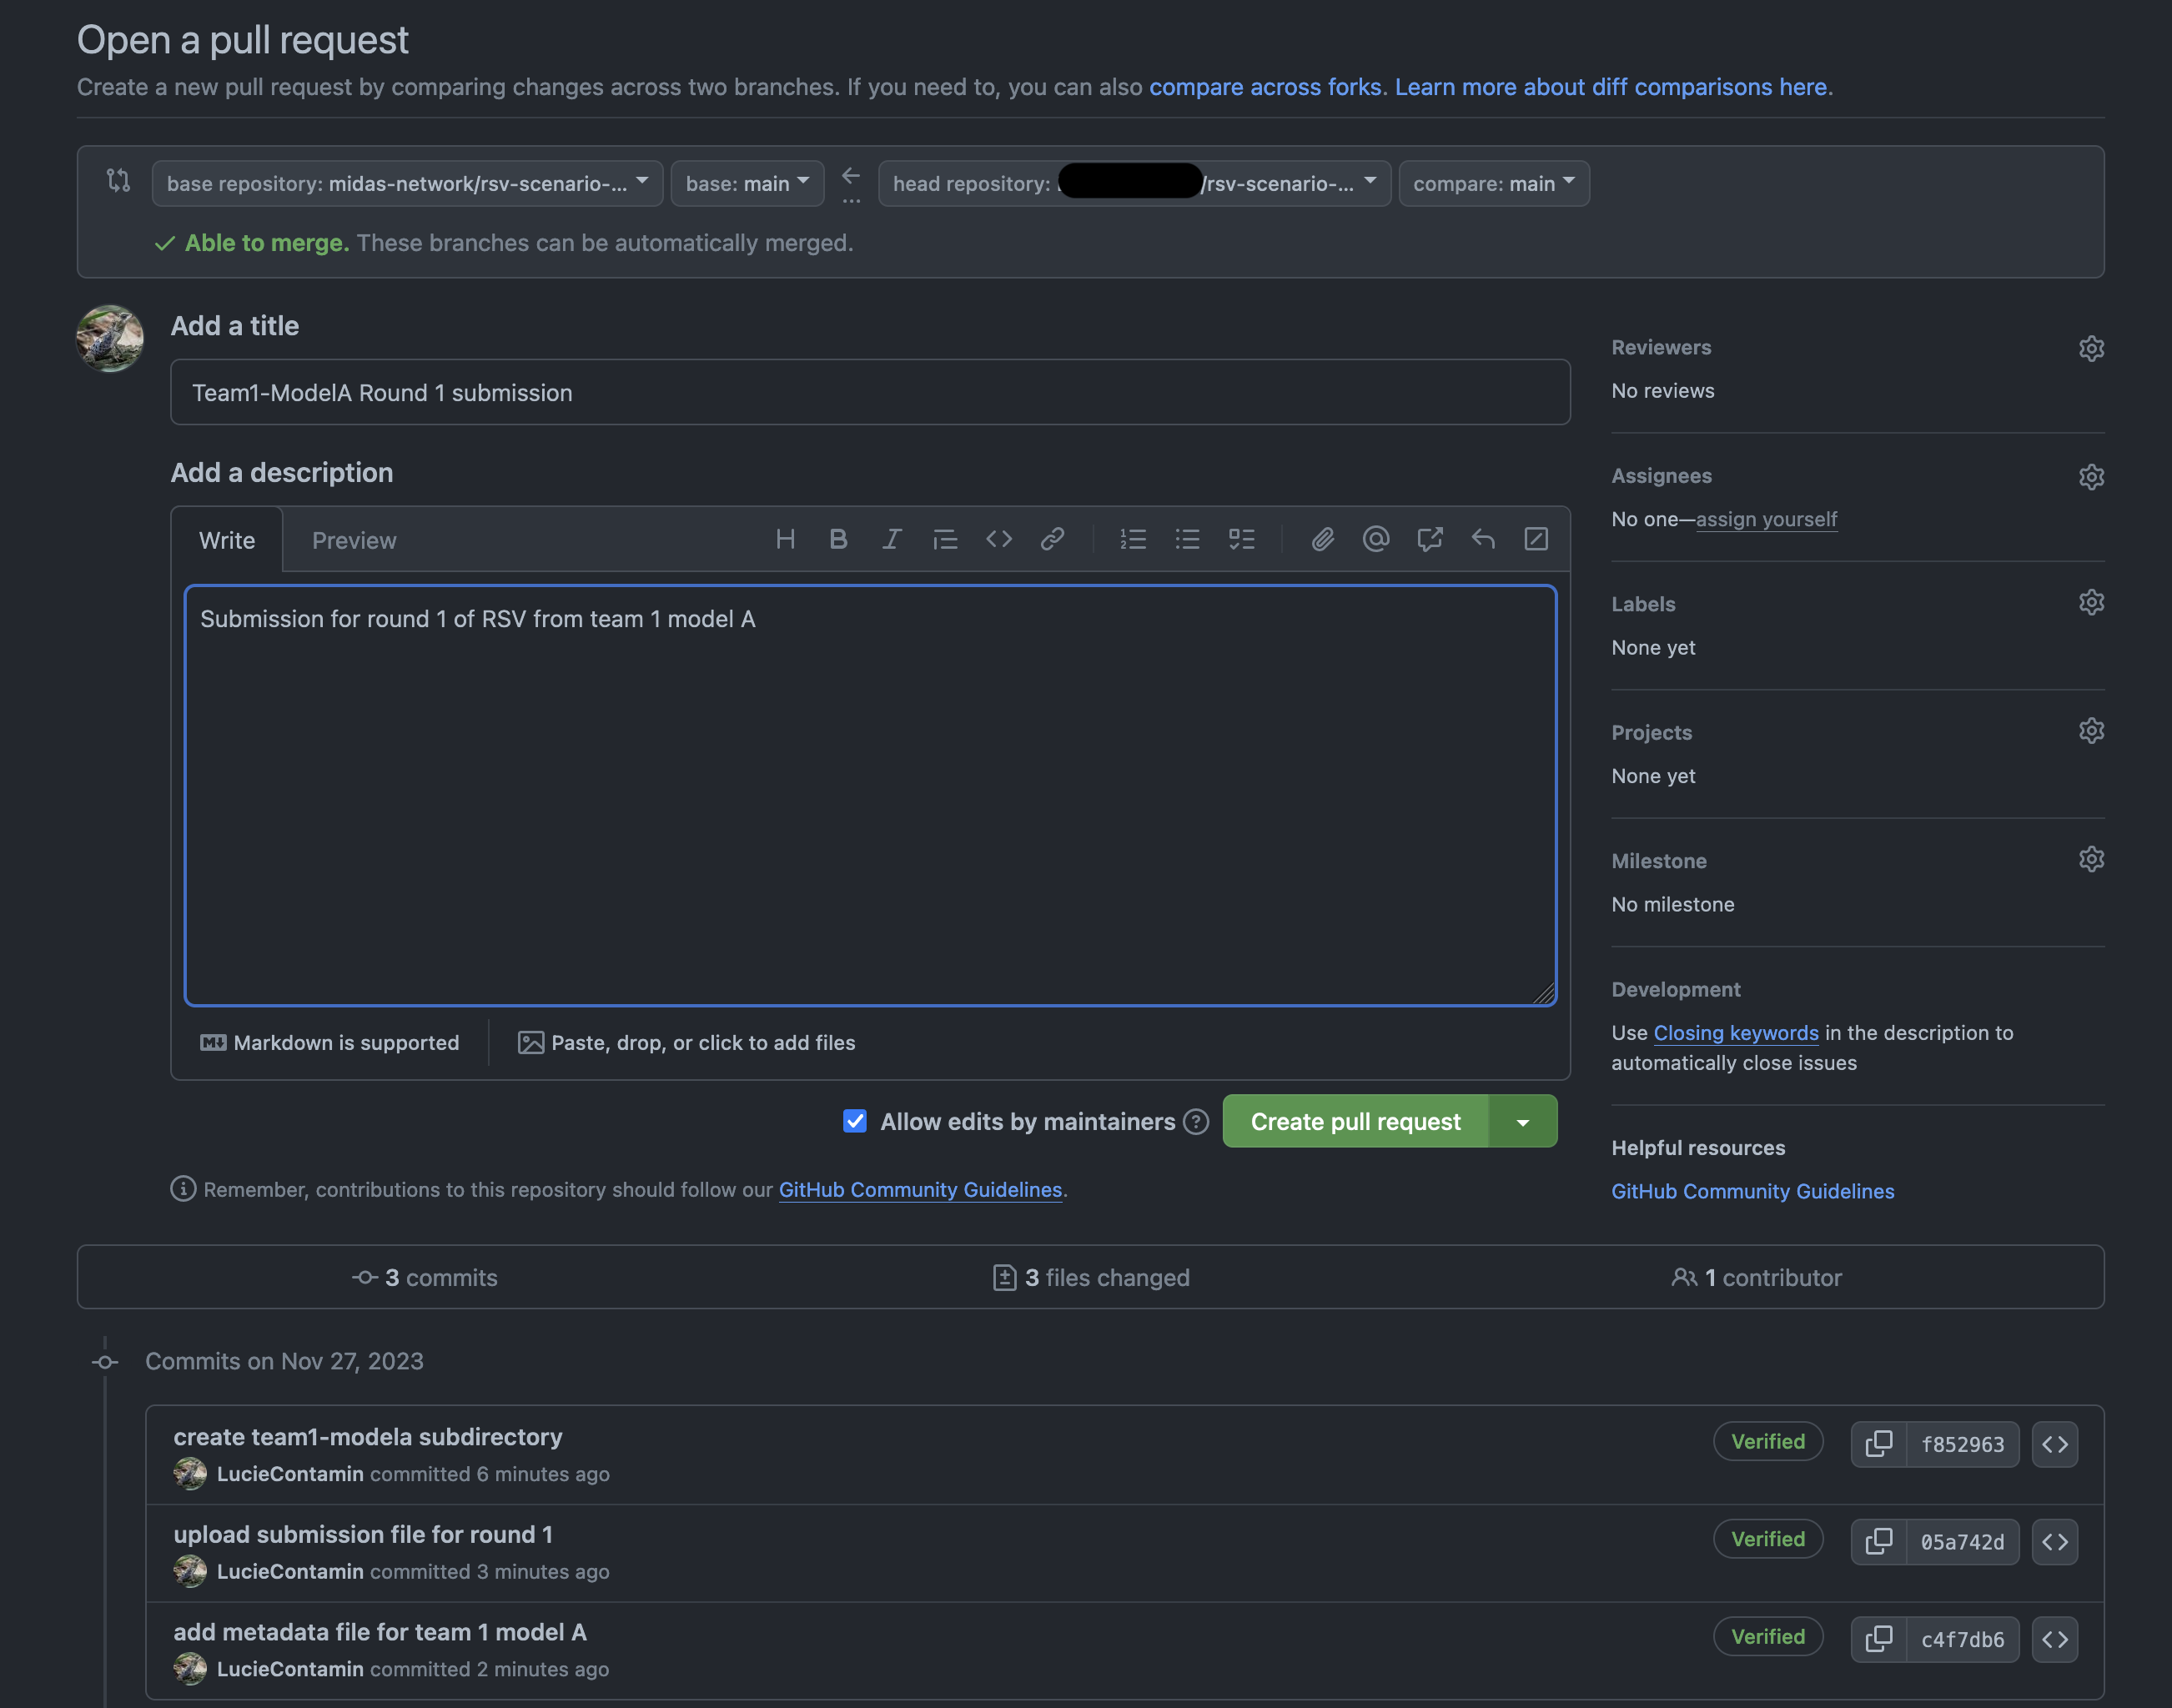
GitHub will then ask you to provide a title and a description of the PR. Once this
information is added you can validate your PR by clicking on “Create pull request”.
Once a PR is created, it is accessible in the initial GitHub repository, here
midas-network/rsv-scenario-modeling-hub repository, at the
Pull requests
webpage
Additional resources
For more documentation on pull-request, please consult:
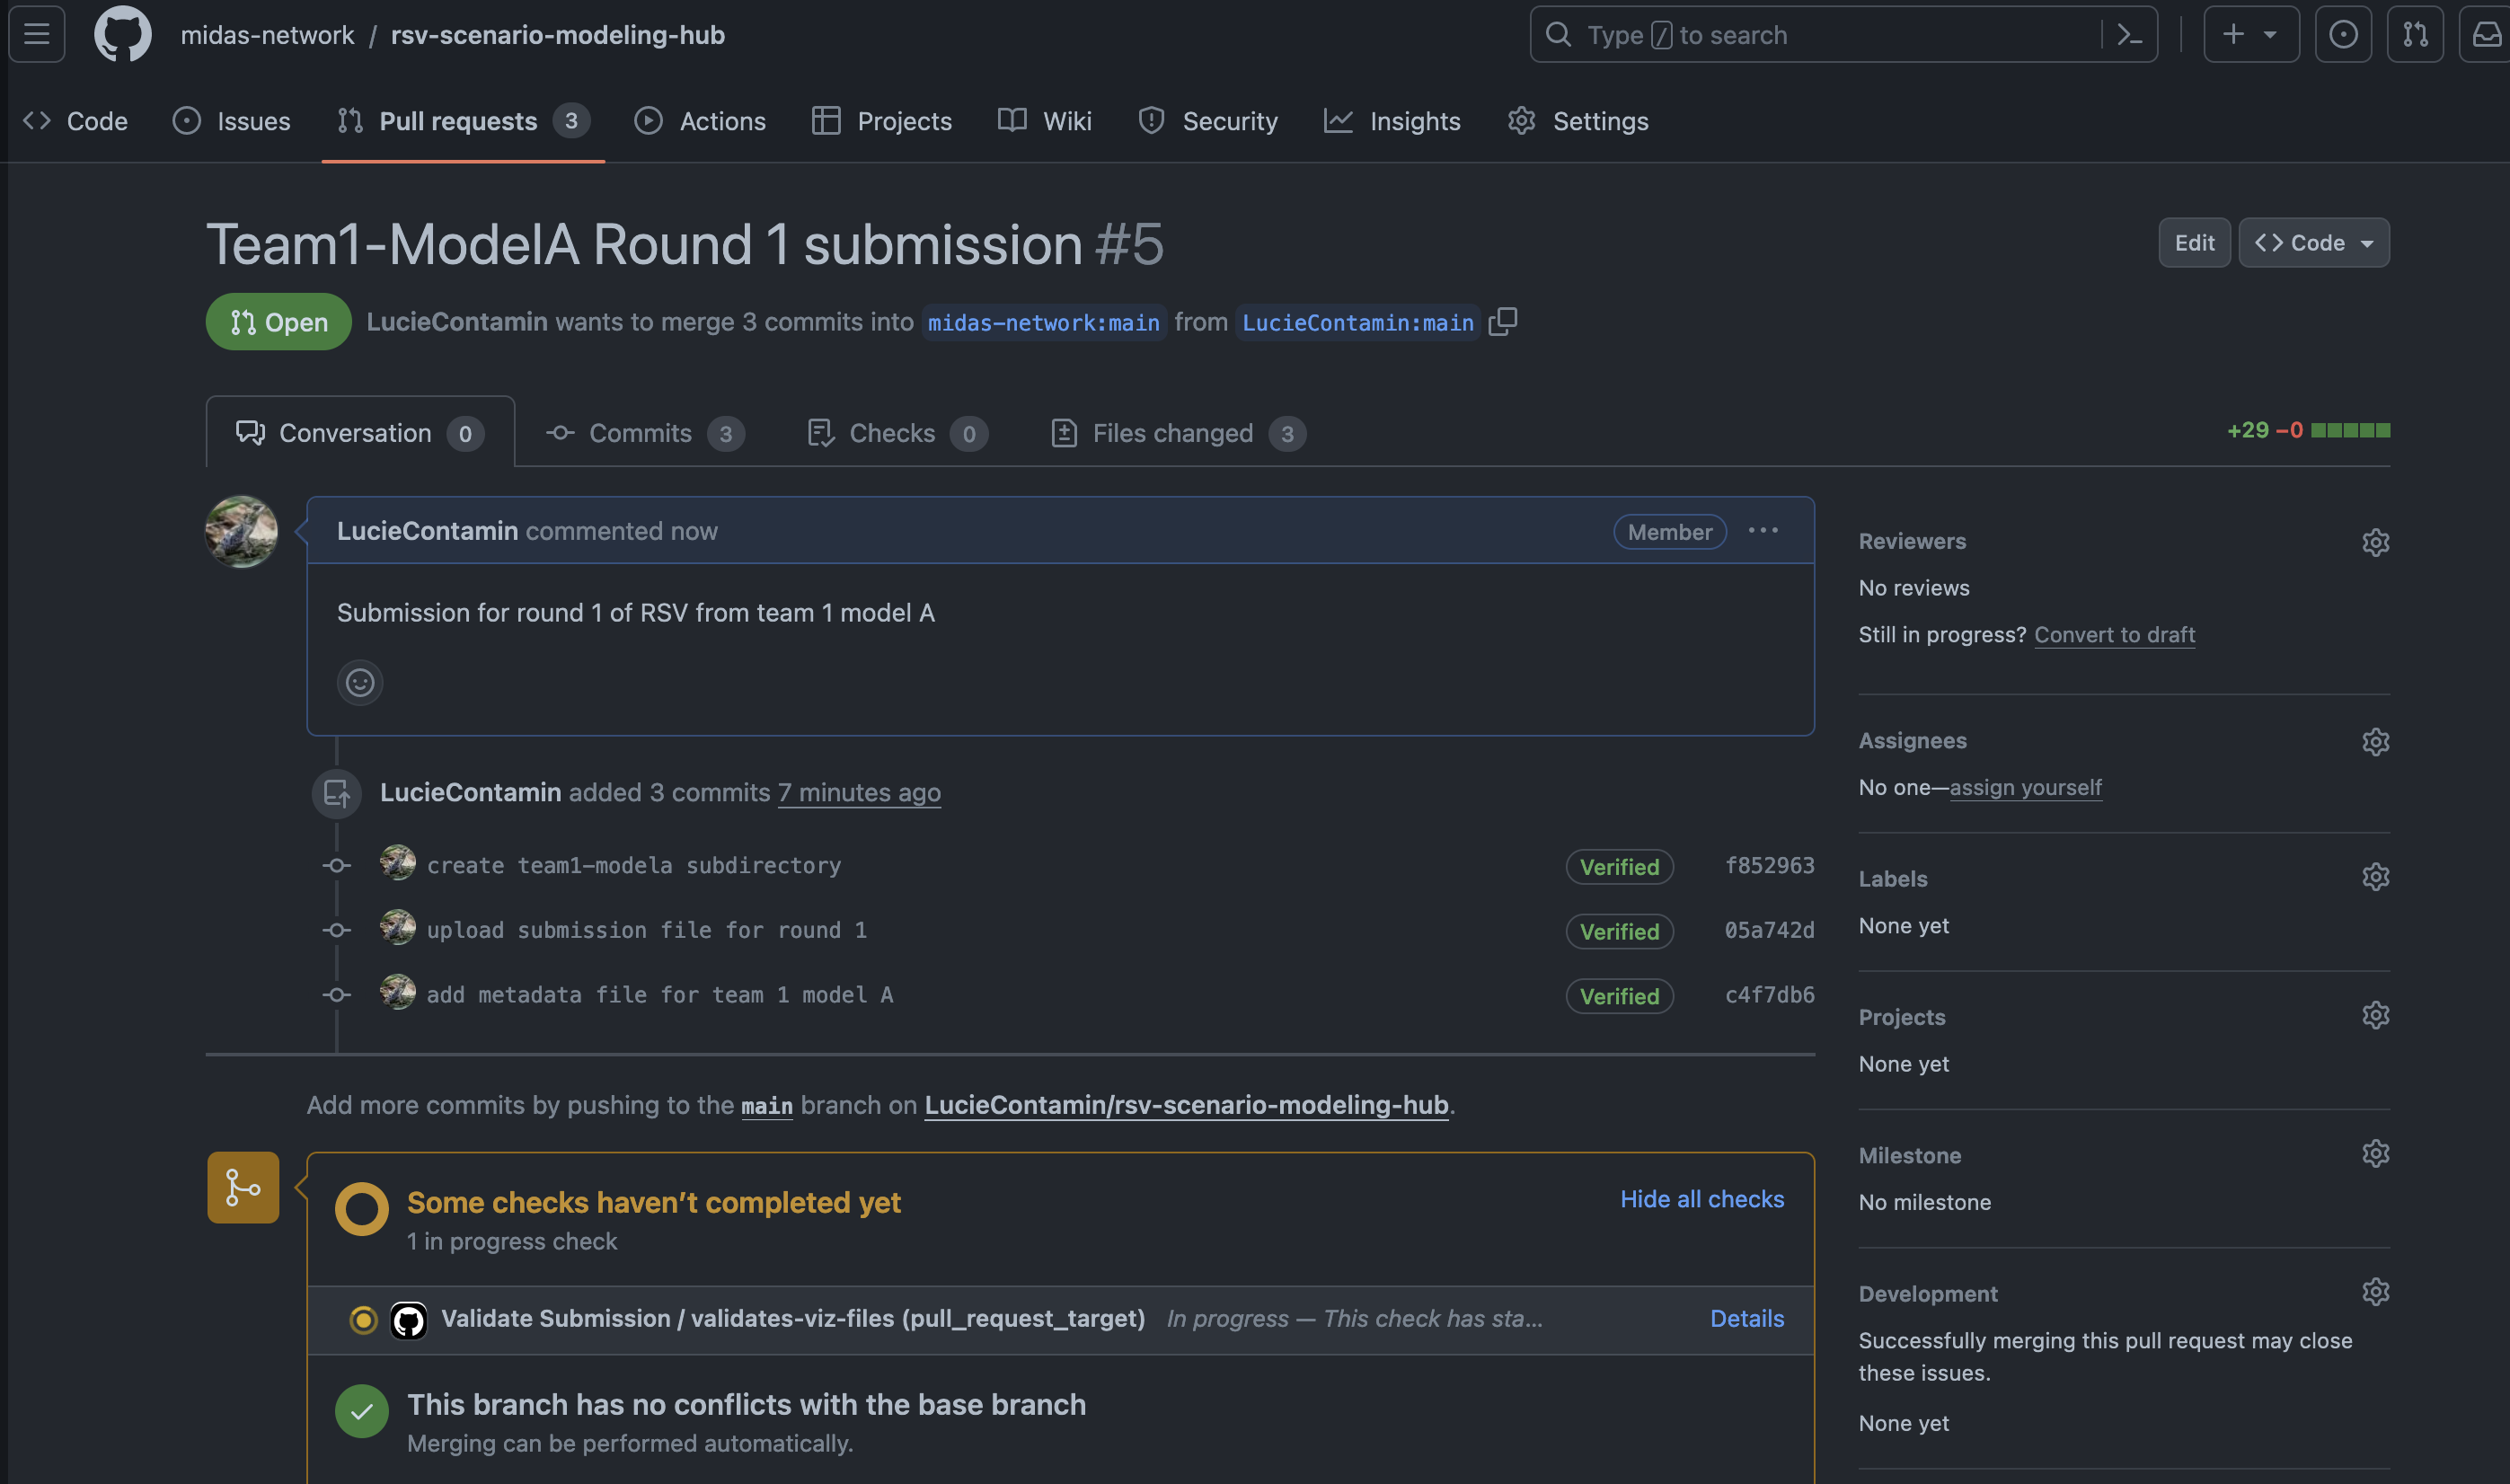
5. Pull-request Feedback
Now that the PR is created, our automated workflows run to validate your submission files. While the validation runs, a yellow circle should appear at the bottom of the page with the message “Some checks haven’t completed yet”. The validation should take around one or two minutes to run, but can take up to 30 minutes in some occasional cases (update of the installation cache for the validation).
Validation Results
Once the validation is done, a message will be posted on the PR.
An email will also be sent to warn you your PR has received a new message.
Please refer to the
Types of emails GitHub sends documentation webpage for more information.
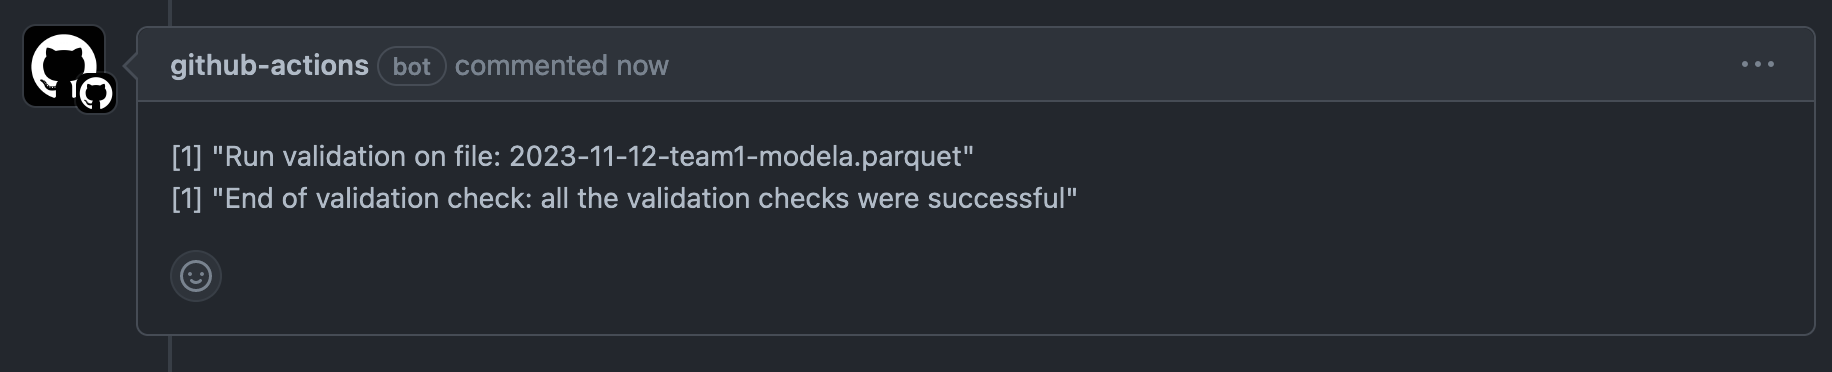
No issues - validation passed
If the validation passed, the yellow circle will be replaced by a green check with
“All checks have passed” message.

Also, a message with more information will be posted on the PR.
- If no issue or warnings are found:
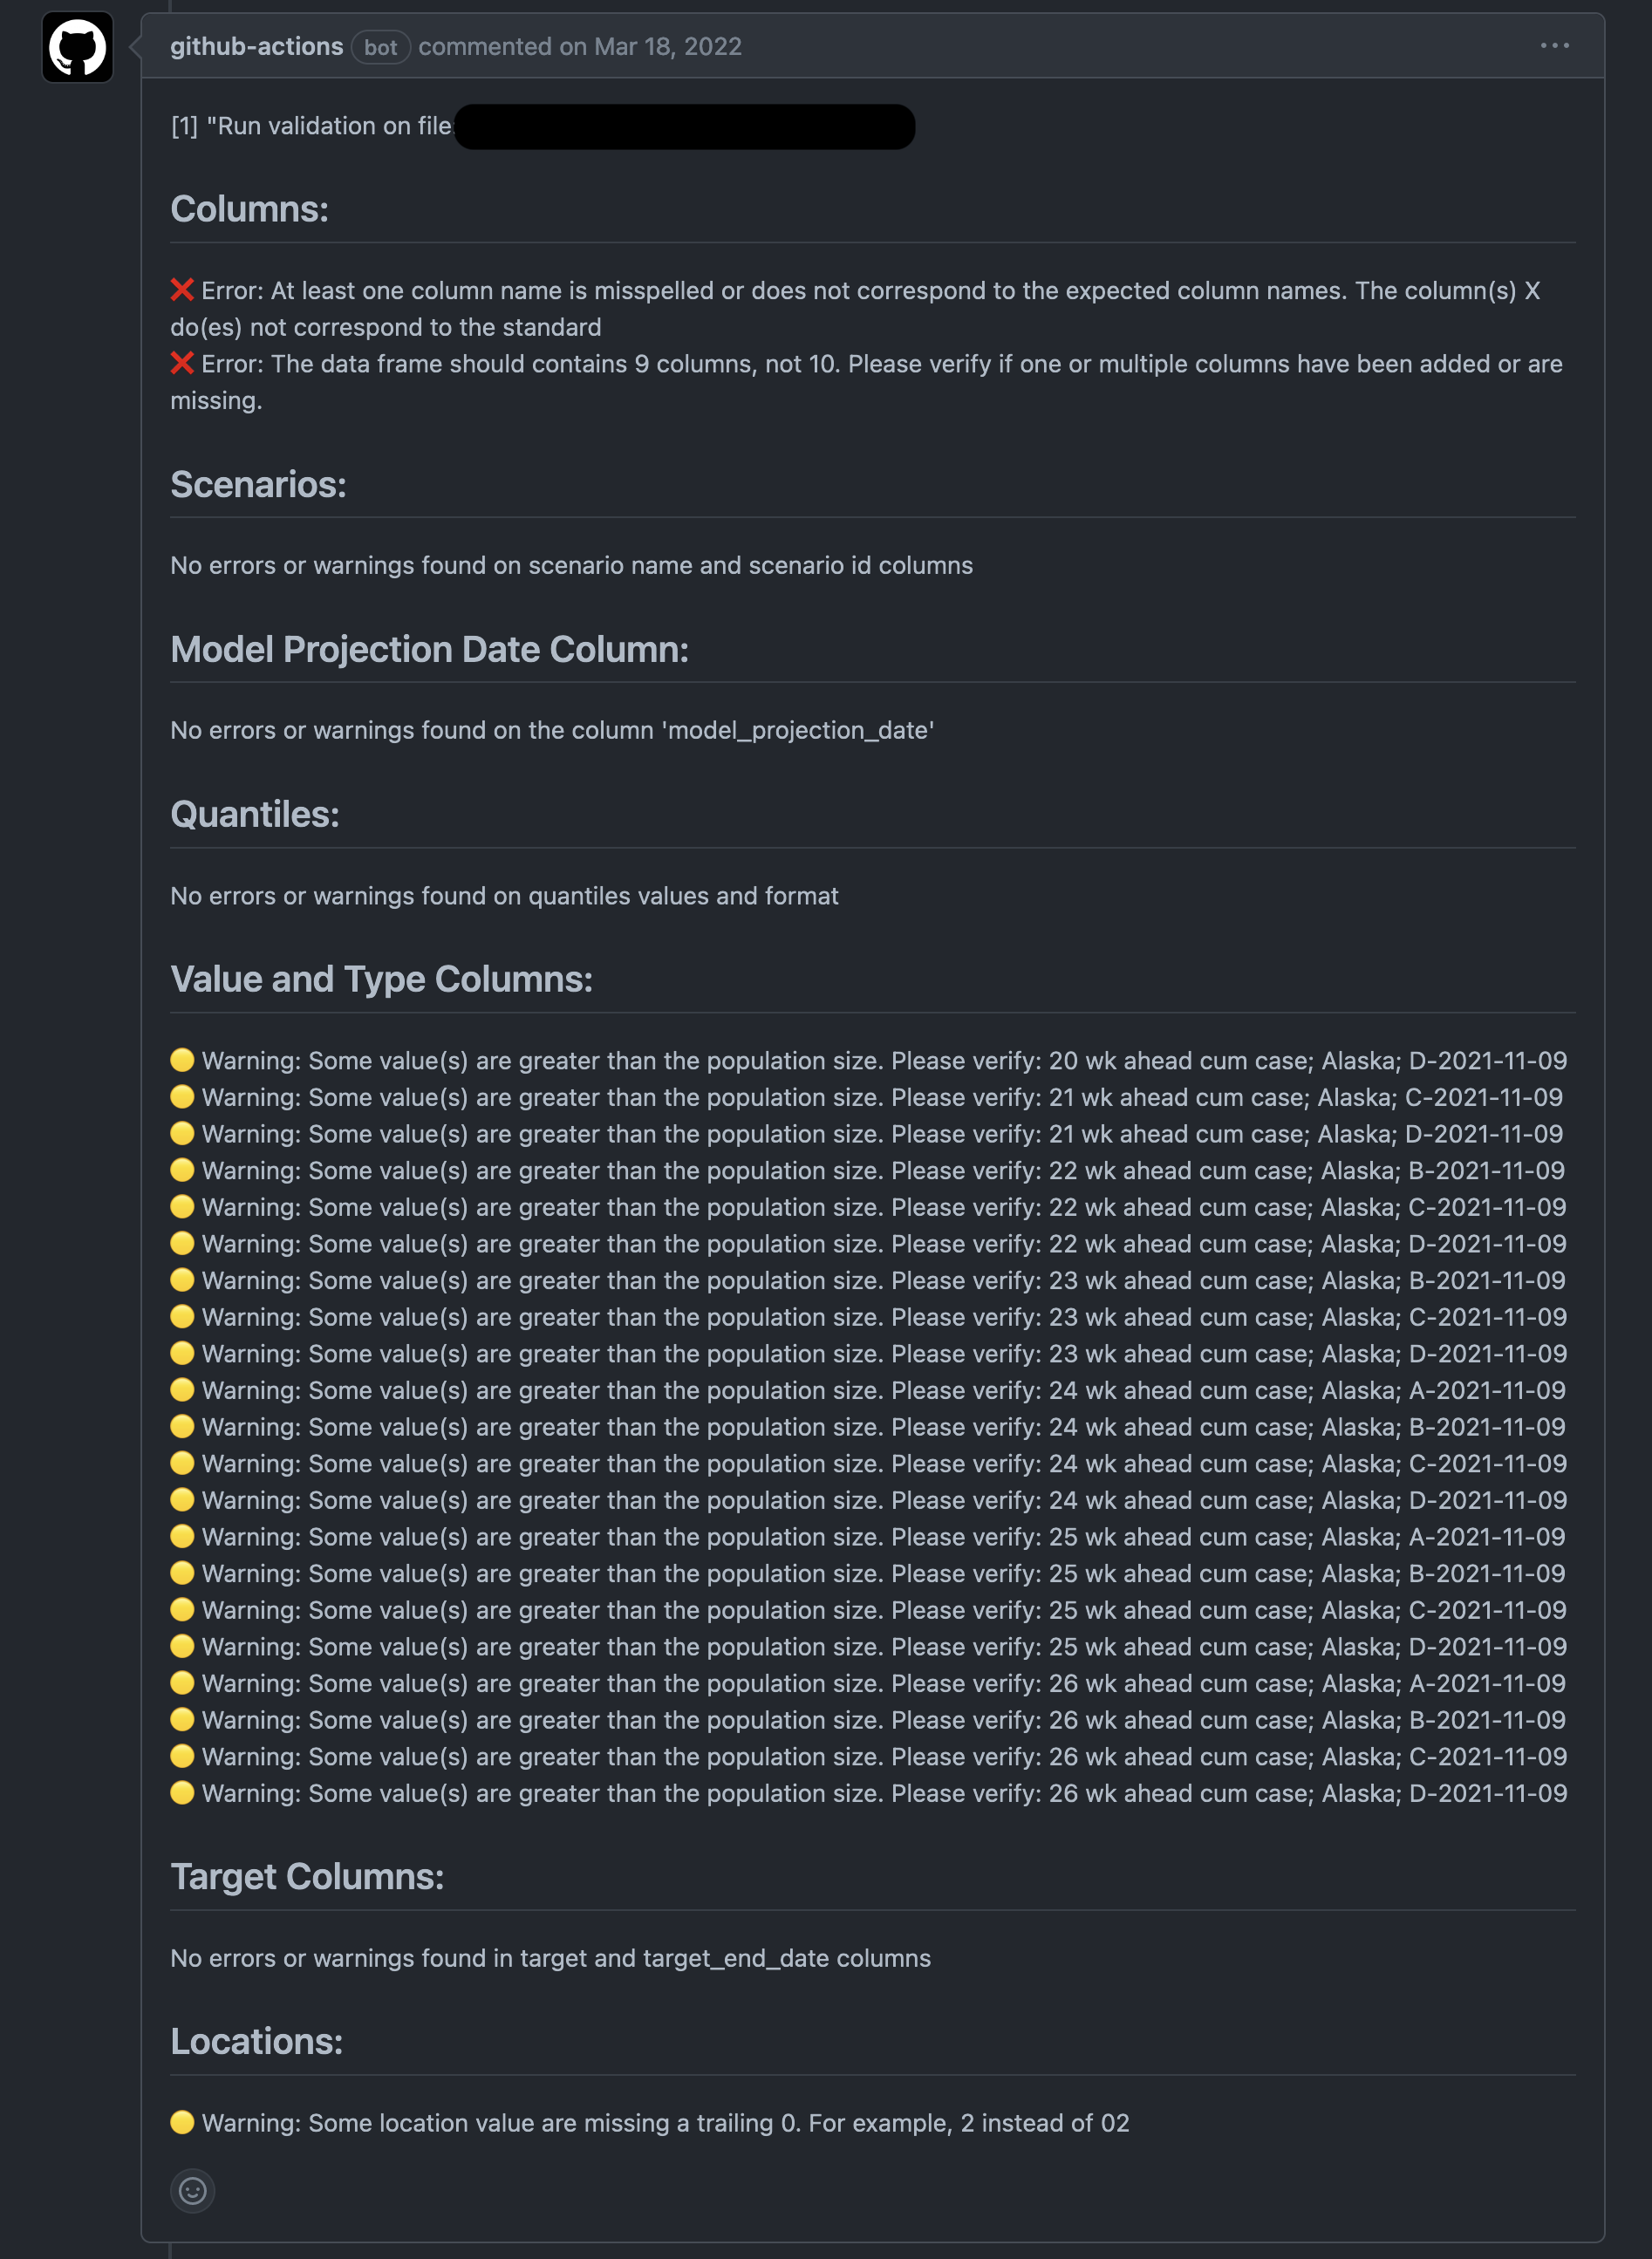
- If warnings are found, a detailed report will be presented, for example:
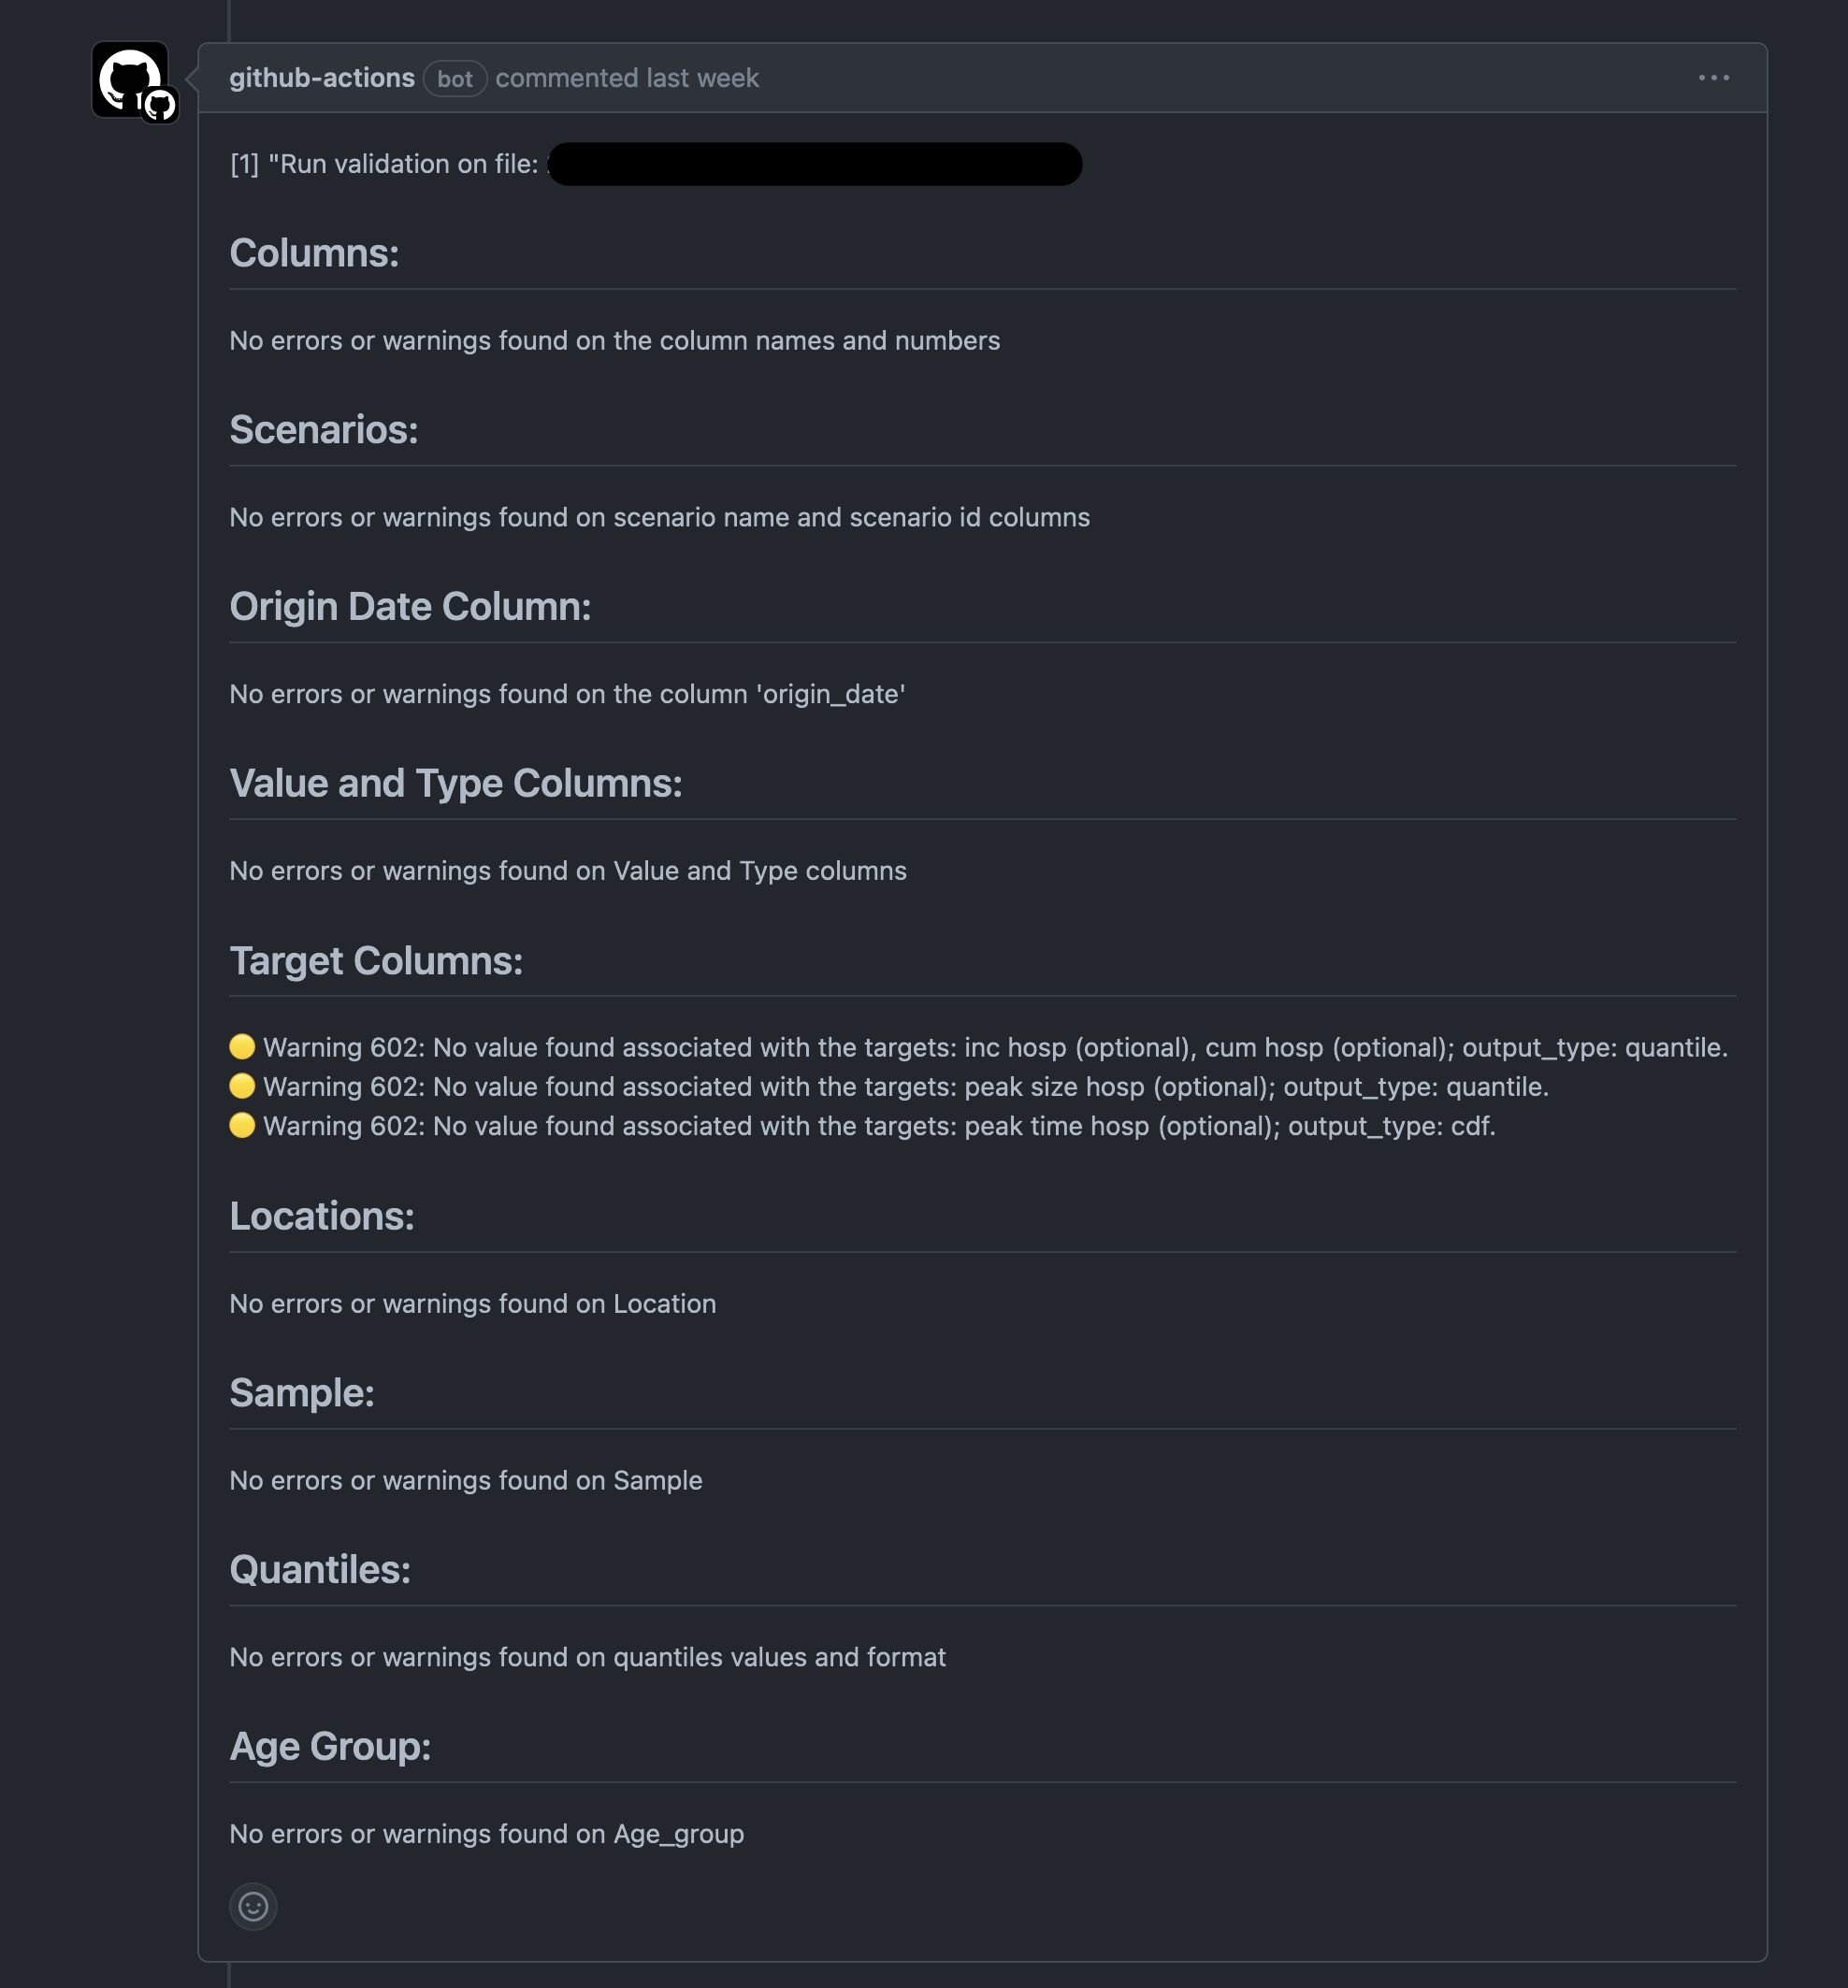
In case your PR contains some warnings, the validation still passed and your PR will be accepted. However, we might contact you for more information if necessary.
Validation failed
If the validation failed, the yellow circle will be replaced by a red cross and the
message “All checks have failed”.
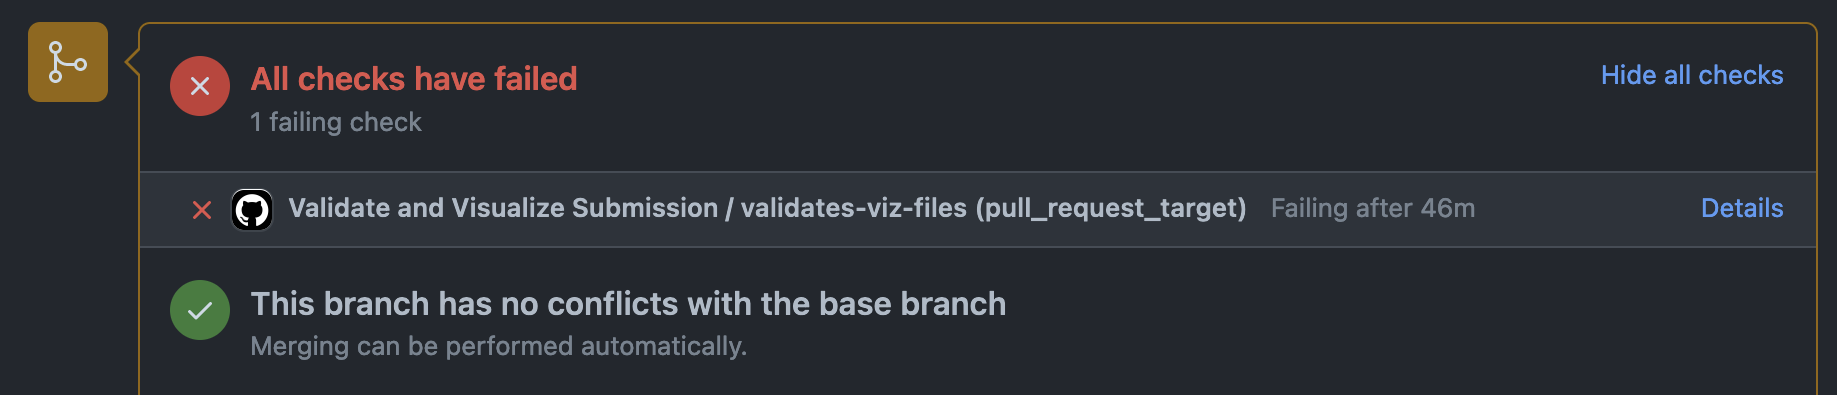
Also, a message with more information will be posted on the PR, for example:
Visualization
A second message should only appear if your submission projection file contains
“quantiles” targets (optional). In this case, a PDF file containing some
visualization might be available
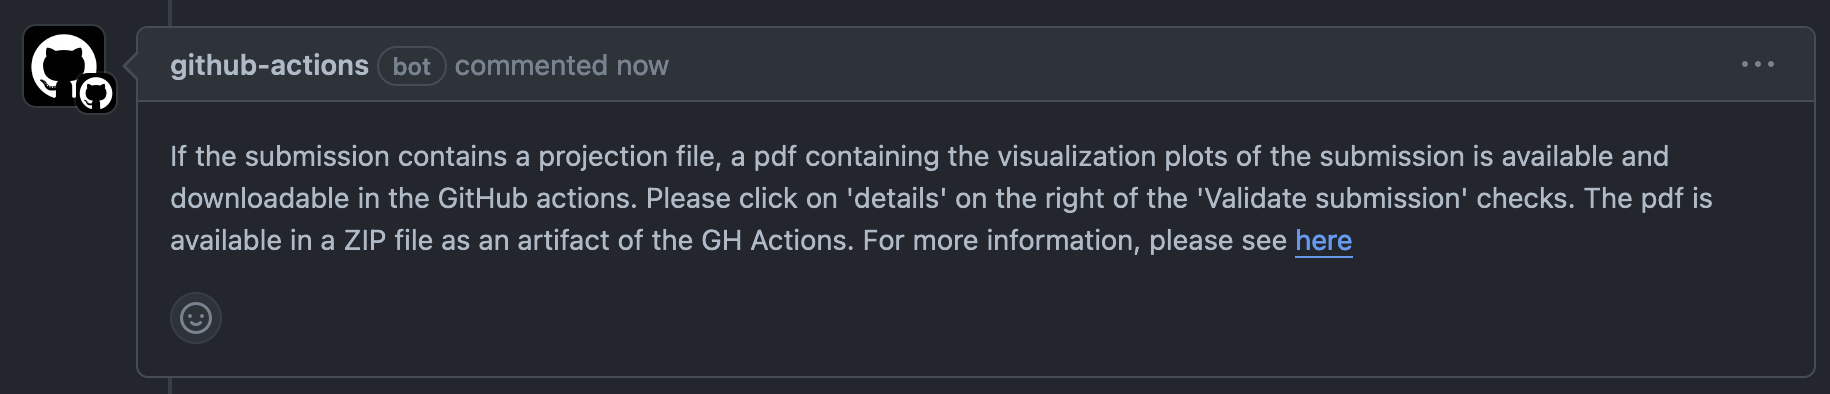
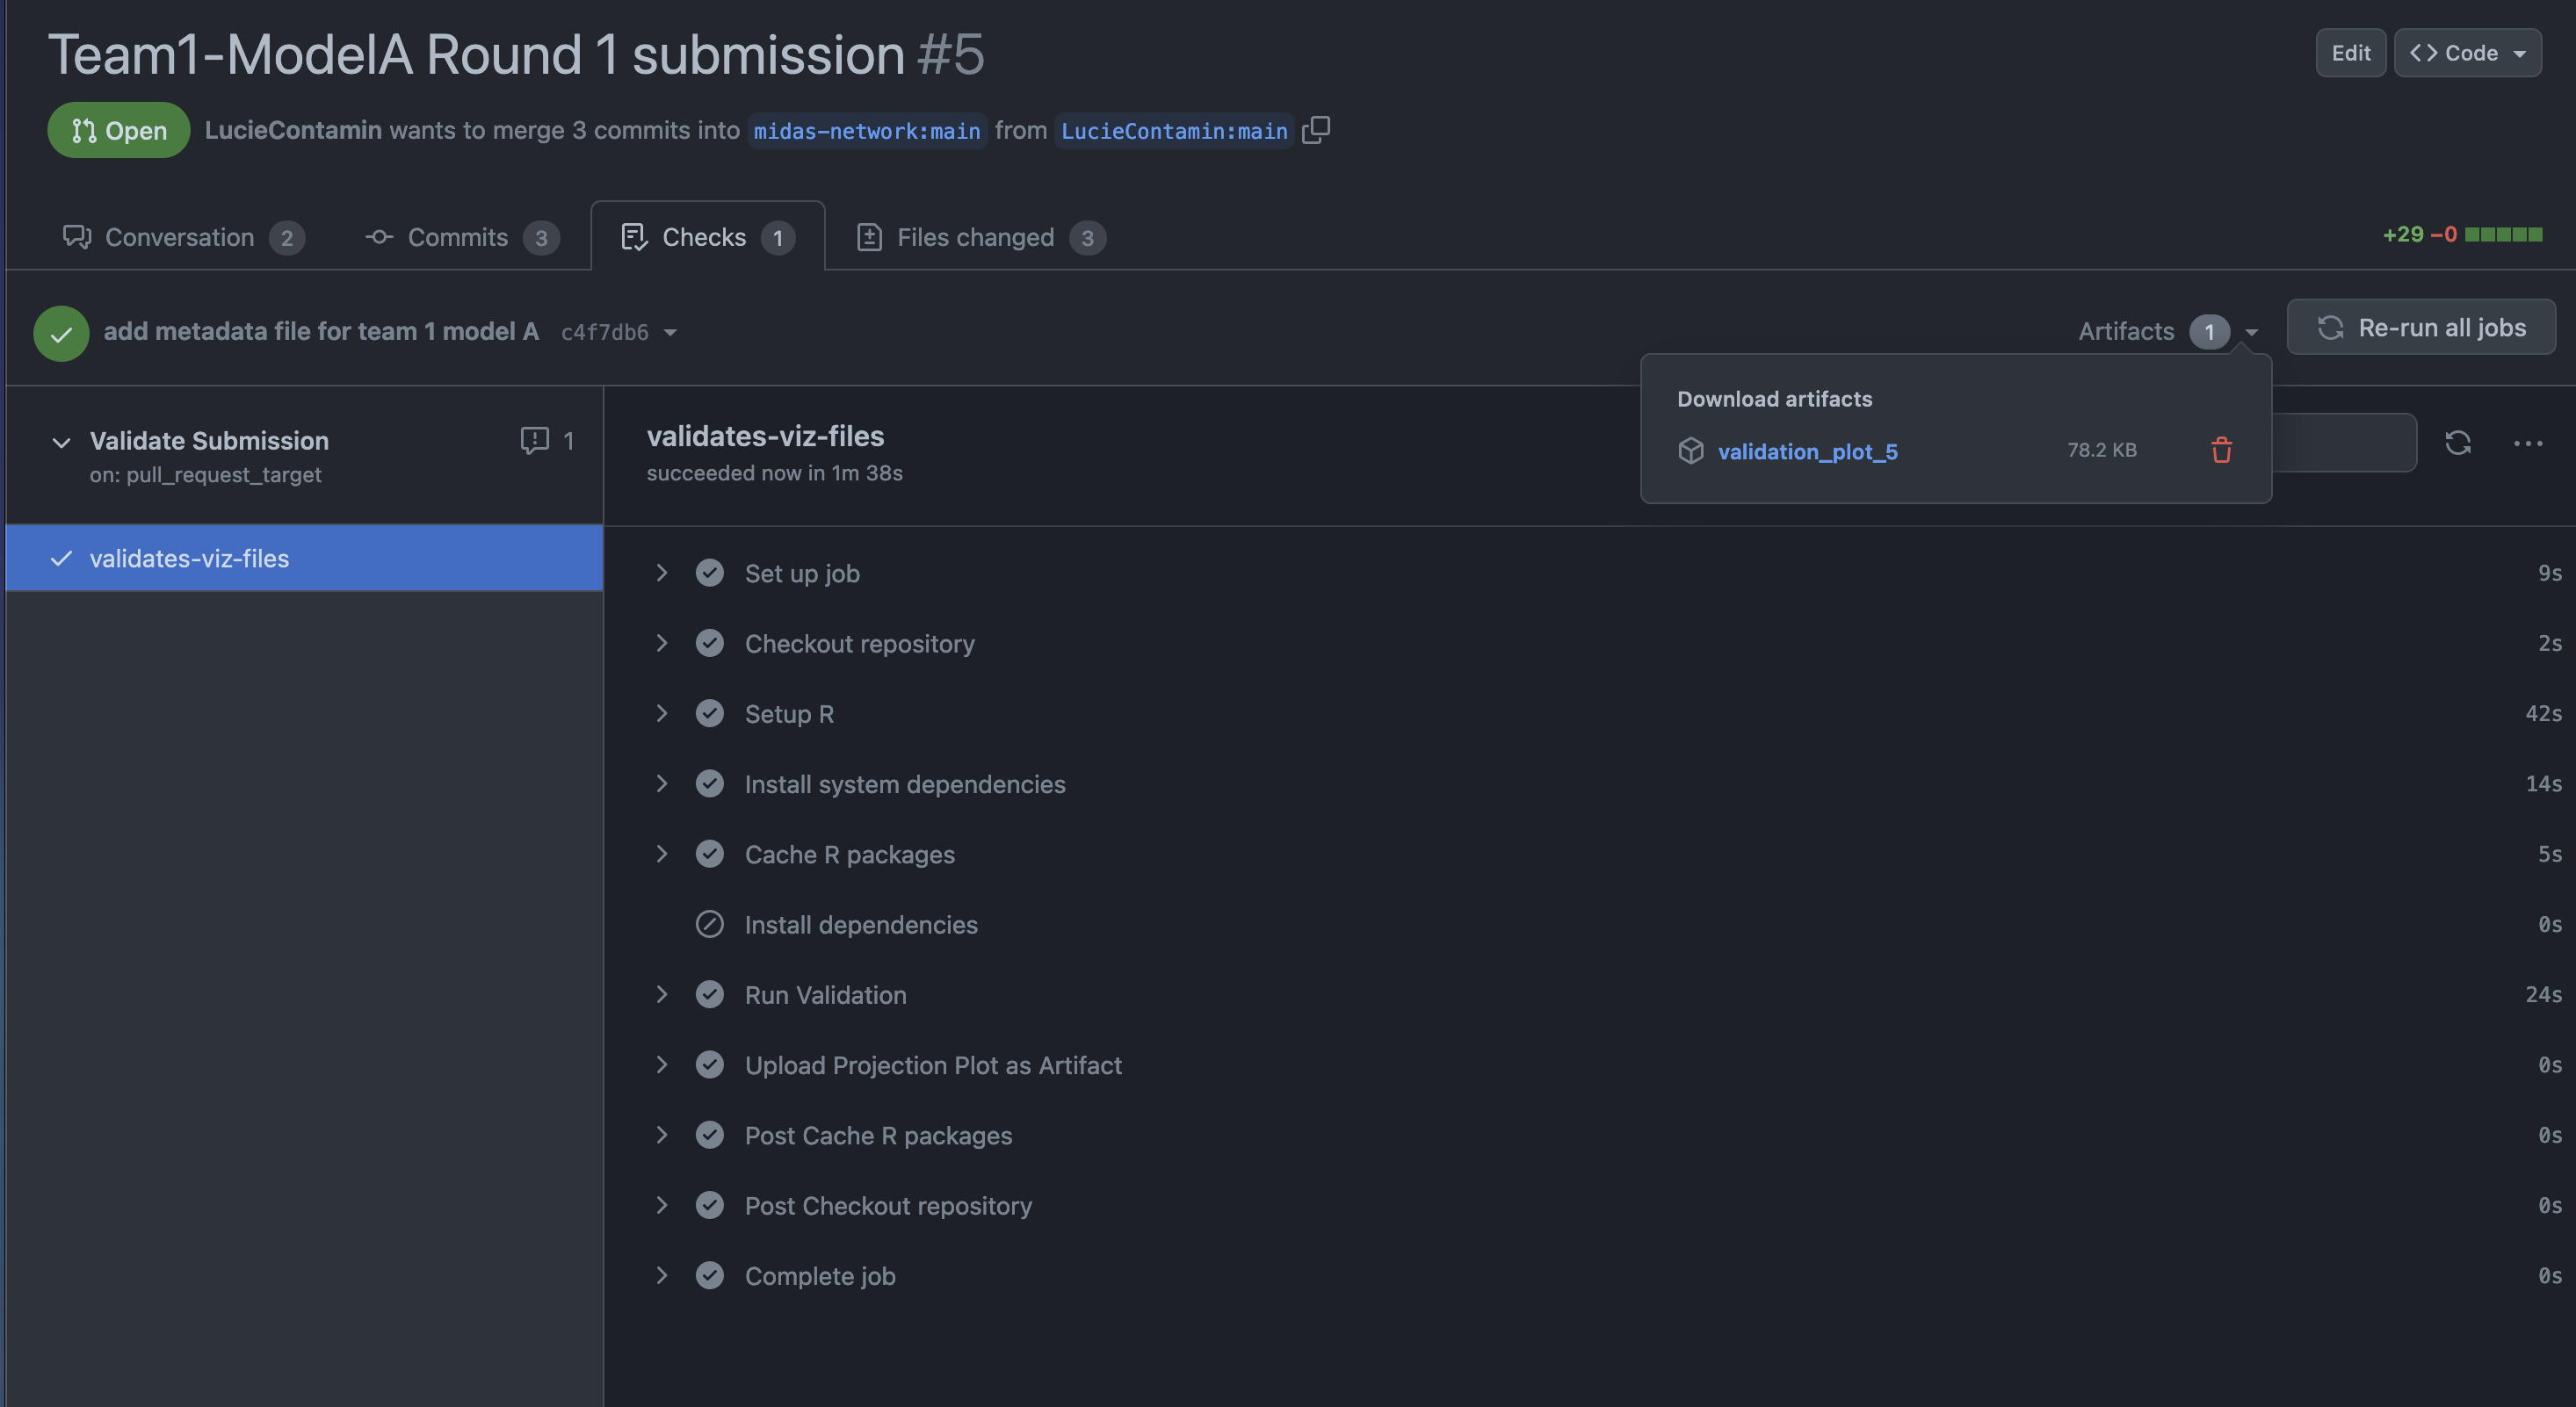
The PDF is accessible in a ZIP folder and downloadable by going to the “Checks”
tab on top of the PR and then by clicking in “Artifacts”.
Update your PR
If the validation failed or if you wanted to modify a file, please feel free to make any changes on your forked repository (uploading files, deleting files, etc.). If the PR is open, any change on your forked repository will be automatically also available on the PR and the validation should also be automatically triggerred.
Merge
Once the PR is validated, the PR will be merged by the coordination team, no actions are required. Your submission was accepted!
For information, once merged, any updated made on your forked repository will NOT be reflected anymore on the initial repo, here: midas-network/rsv-scenario-modeling-hub repository. To add your new updates, you will need to open a new PR.
Other issues / questions
If your PR contains messages that are unclear or if you have any questions or
issues about the PR, please feel free to post a message on your PR and tag
@LucieContamin in the message.
If the PR contains information about a merging conflicts, please feel free to also
tag @LucieContamin in a message in the PR, for more information on
how to resolve the issue.
Future Rounds
For the next rounds of submission, you can use your forked
repository to submit.
To submit the next round, you will need to:
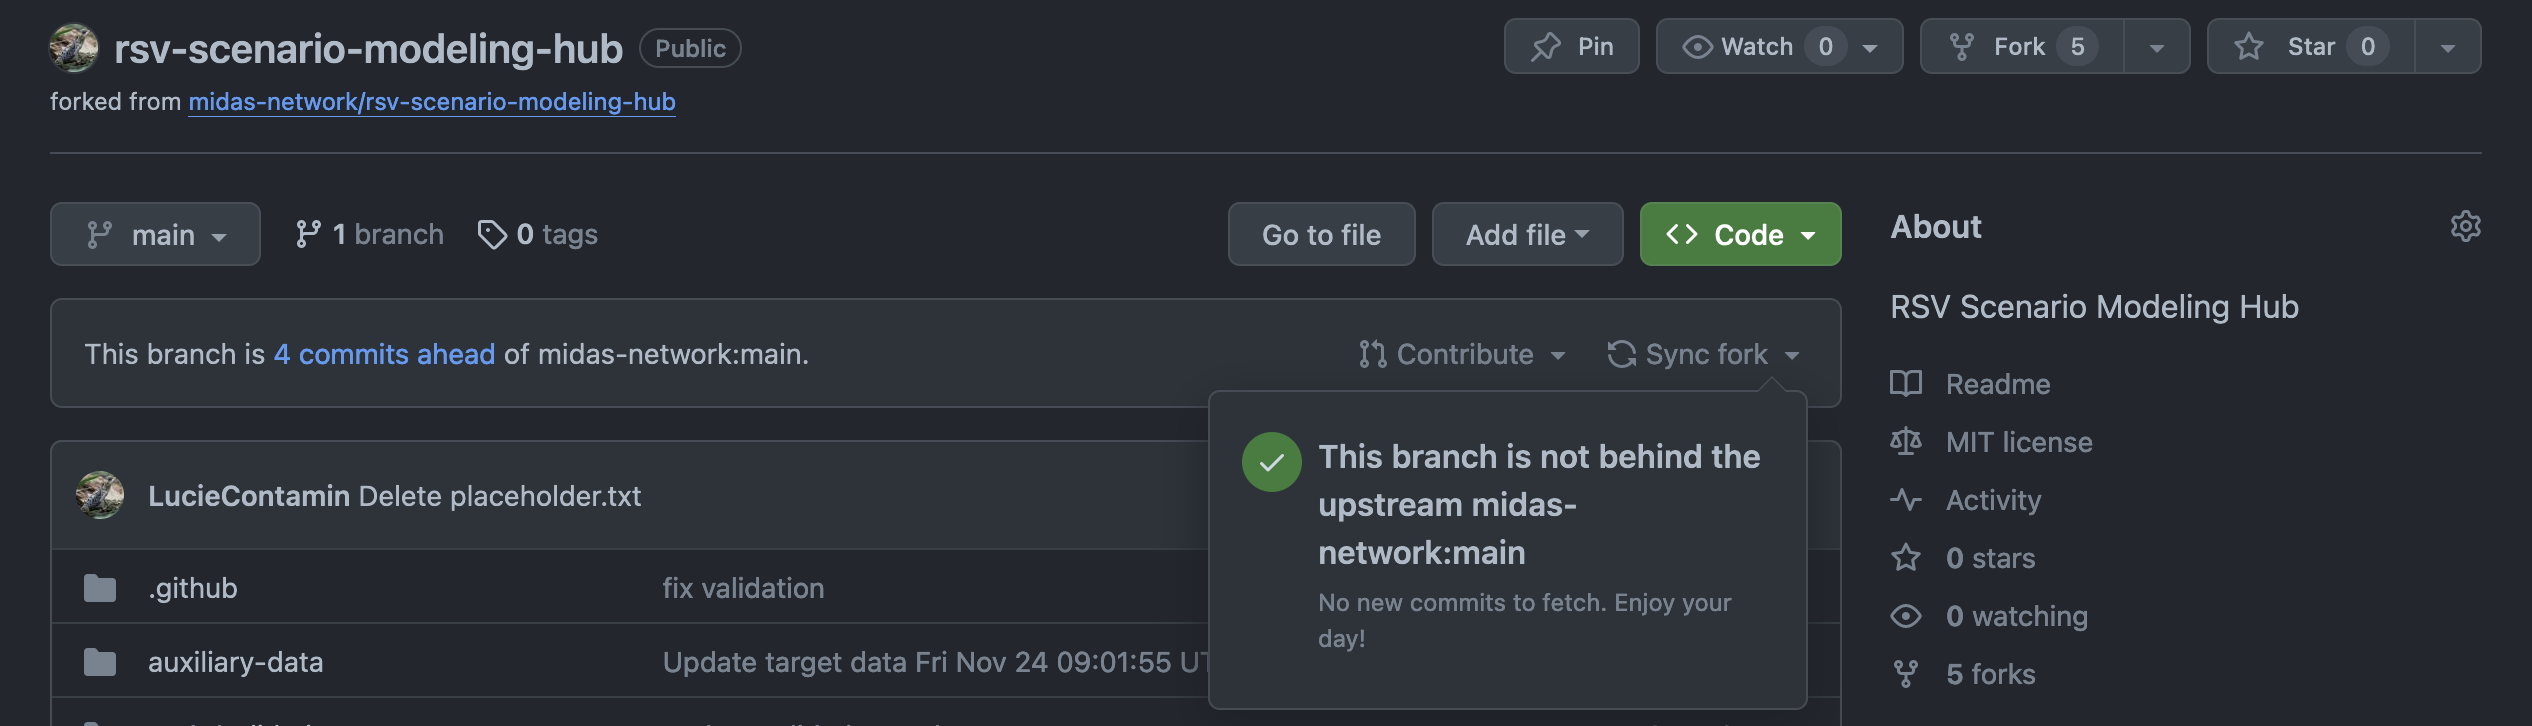
Sync your fork
To sync your forked repository, please click on “Sync fork” >“Update branch”
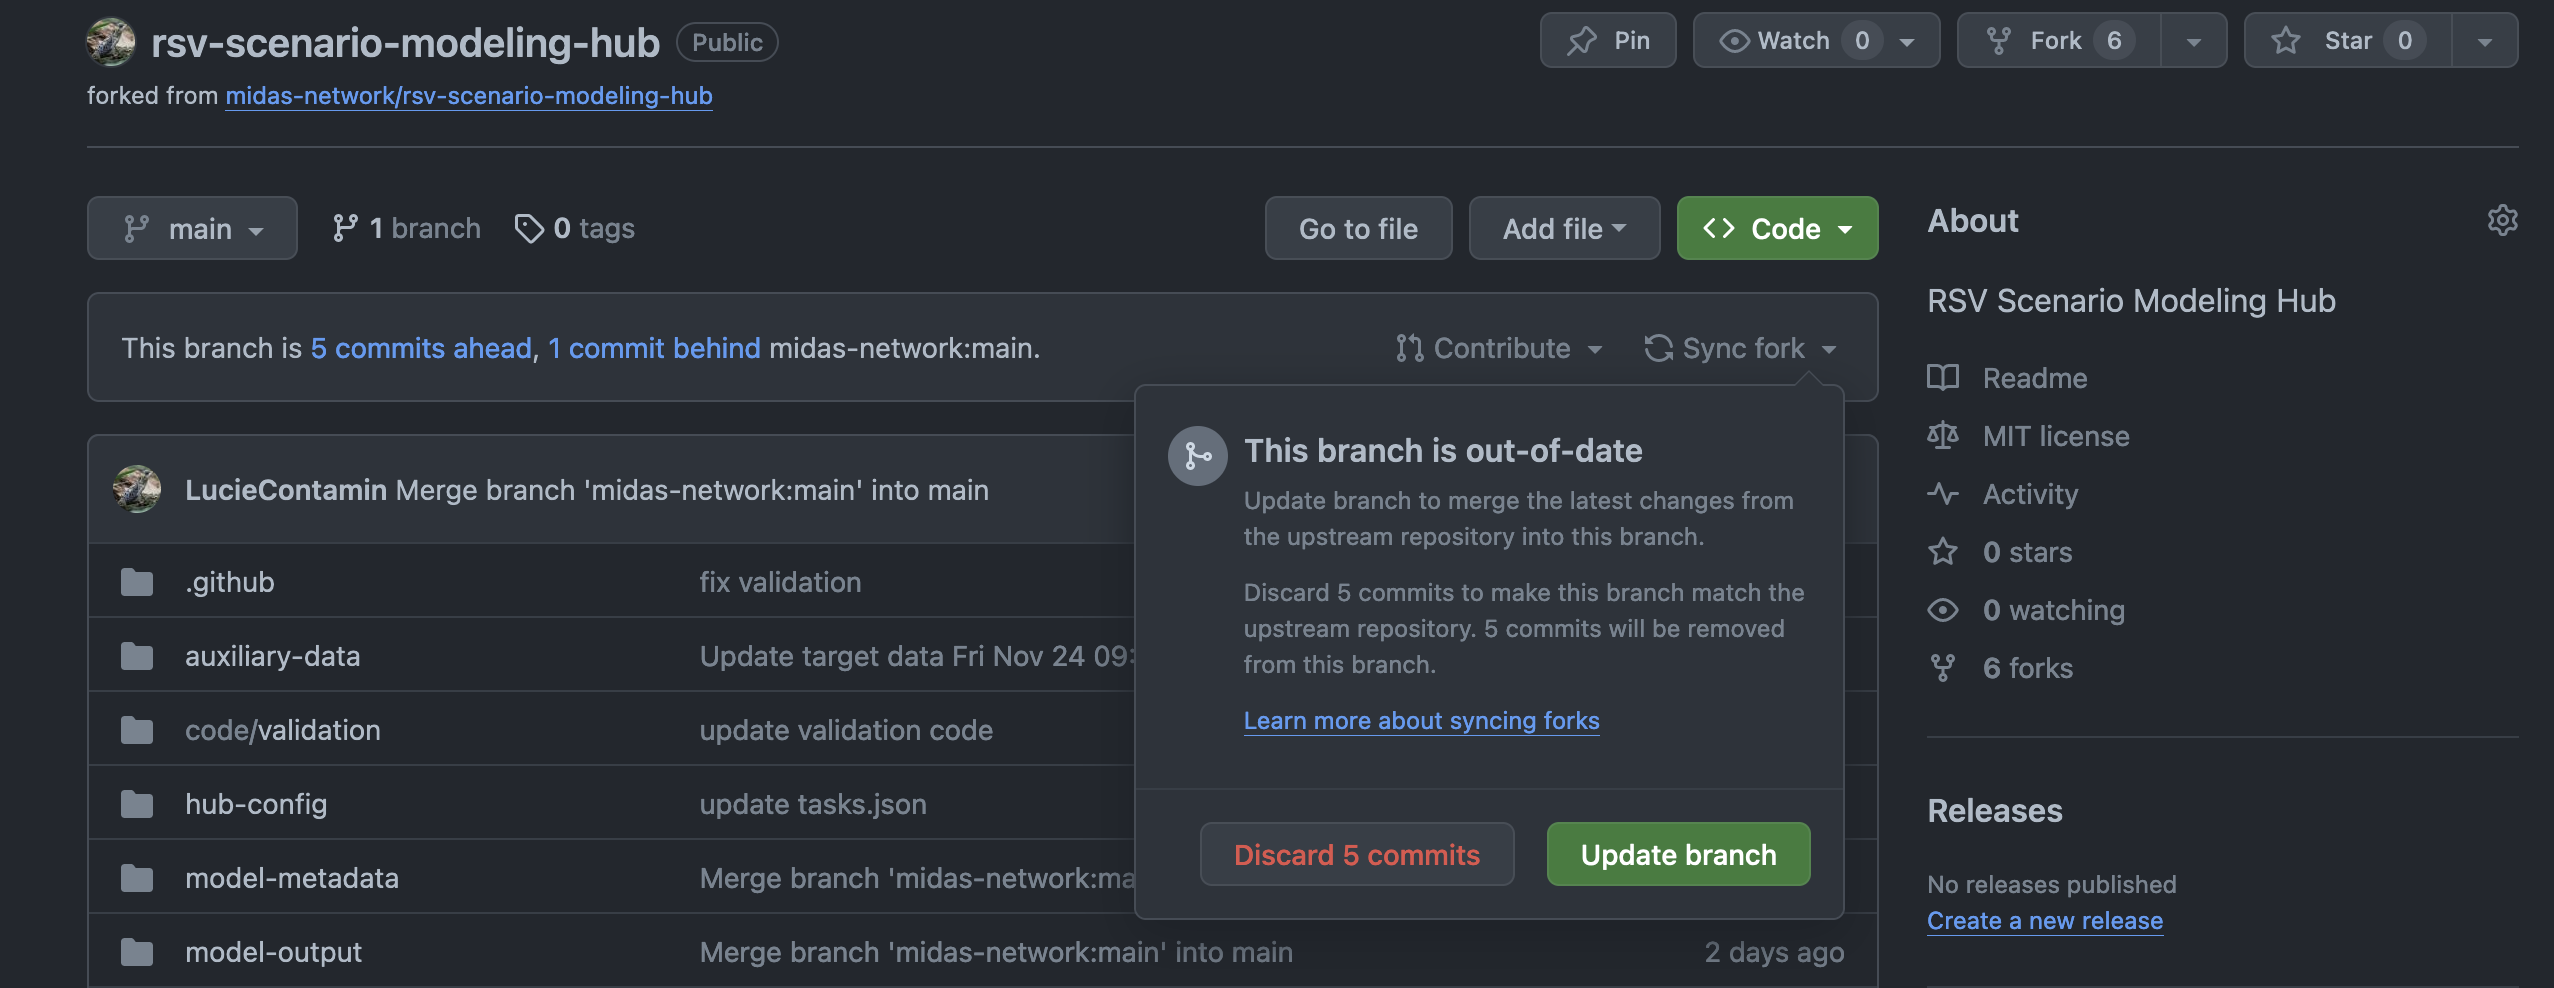
It might take a few minutes. Once done, a temporary message will appear on top of
the page.
If your fork is already up-to-date, a message will appear instead:
For more information about syncing your work, please consult the syncing a fork GitHub documentation webpage.
Other Resources
File management:
- Renaming a file
- Editing a file (not available for all format)
- Moving a file
Workflow:
Tutorial:
Git/GitHub/GitHub Desktop: